Repository Management
All Repositories
When you first head to the repositories page, you’ll be presented with a list of all the repositories in your organization.
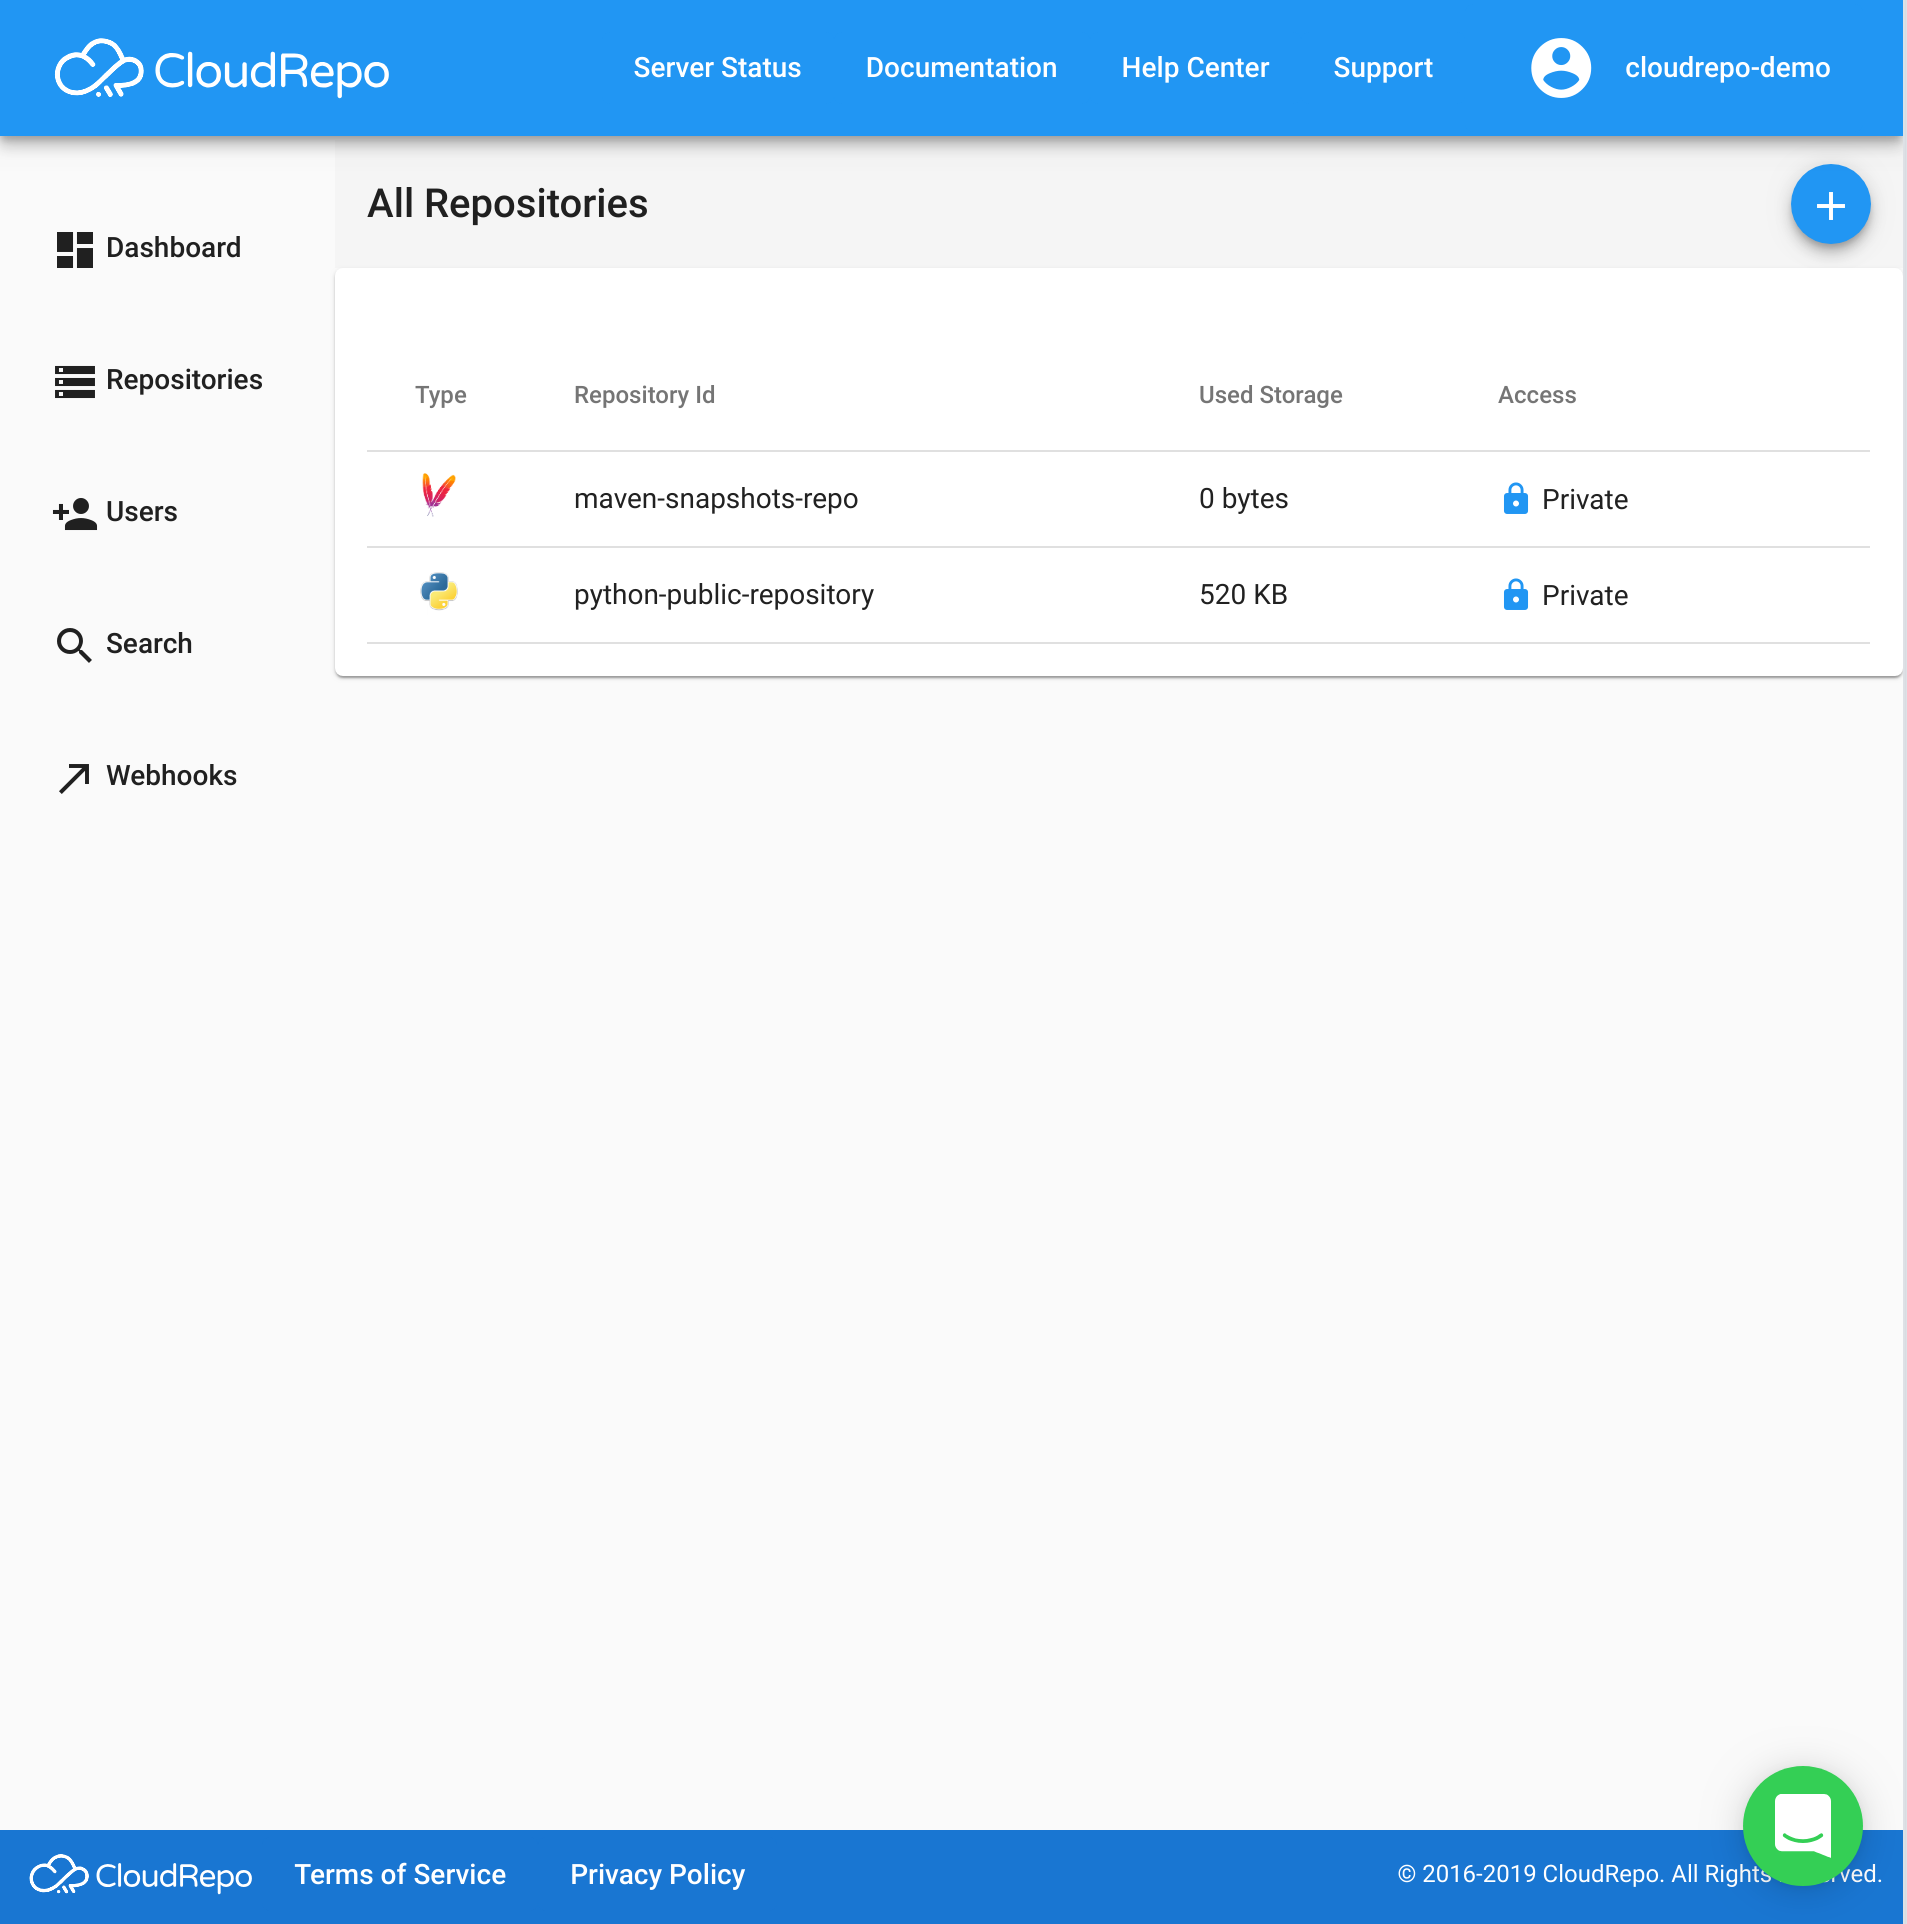
Clicking on an individual repository will bring you to the individual repository overview.
You can also create a repository from this screen by clicking the ‘+’ icon in the ‘All Repositories’ title bar.
Creating a Repository
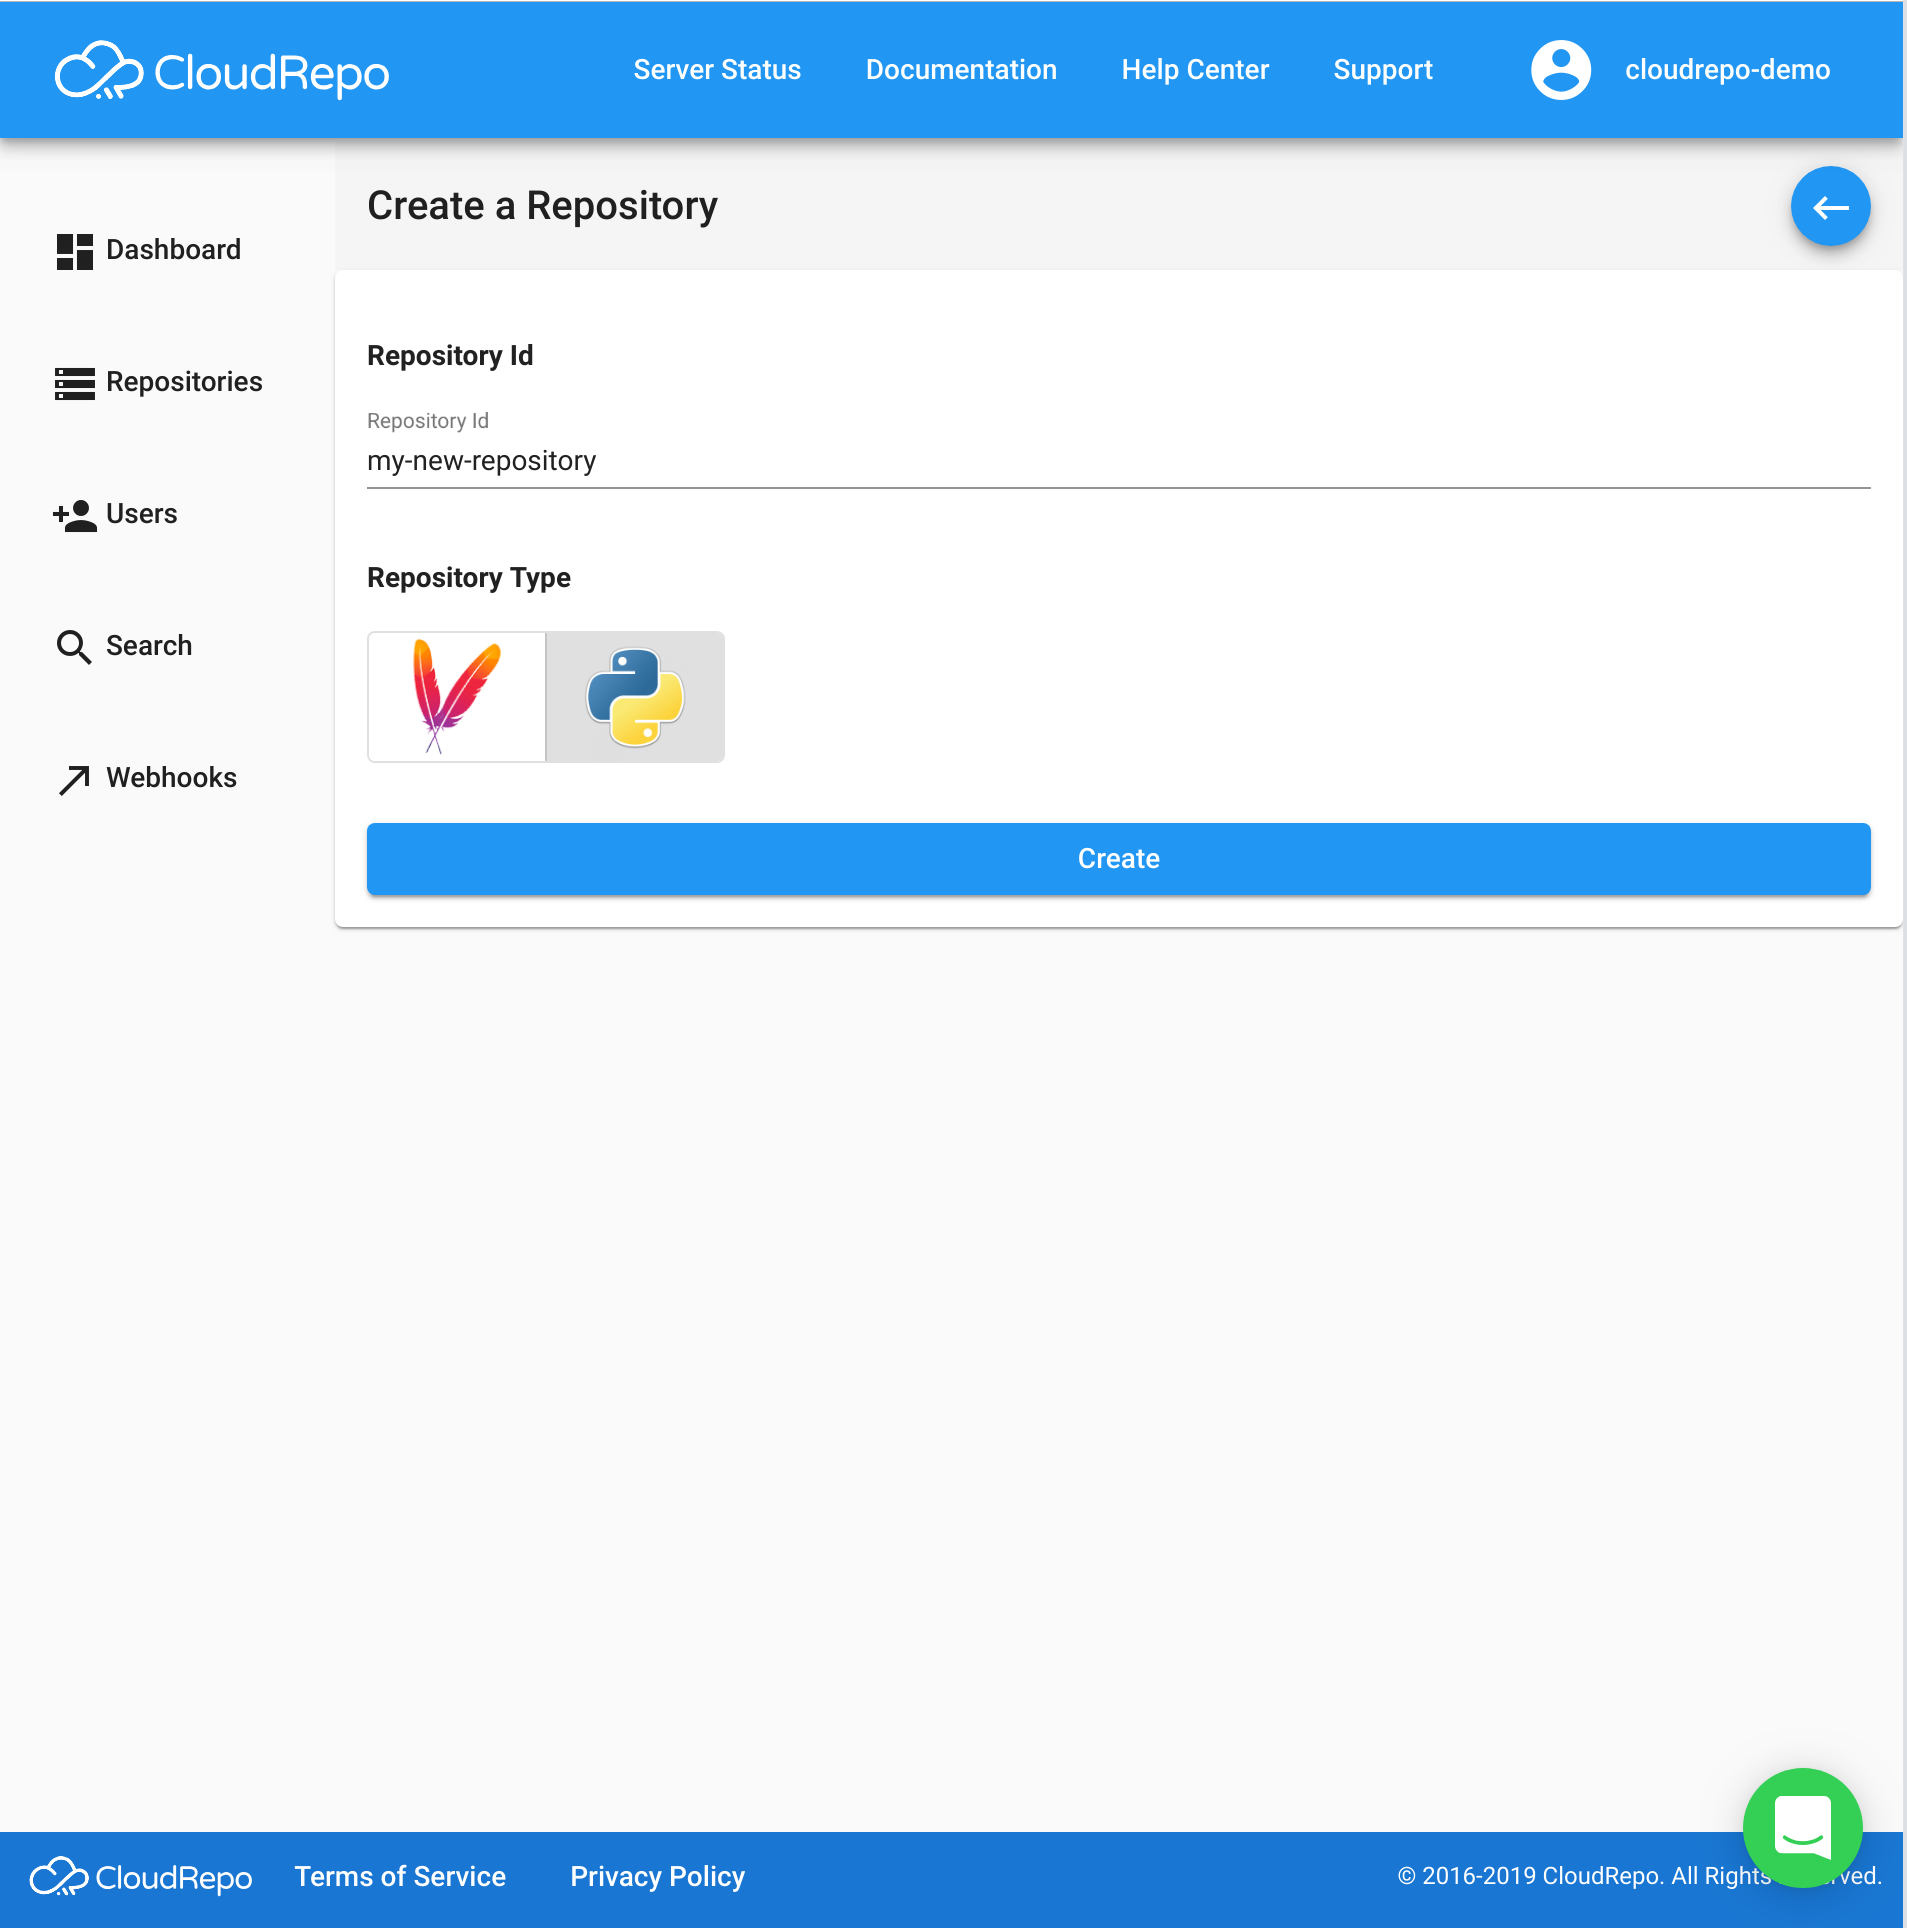
Creating a repository is easy. Once you enter the ‘Create a Repository’ screen, you only have to provide the following information:
- Repository Id
The Id or Name of the Repository you’re creating (ie. ‘snapshots’, ‘releases’, ‘packages’, etc).
- Repository Type
Select either Maven or Python for your repository type.
Managing a Repository
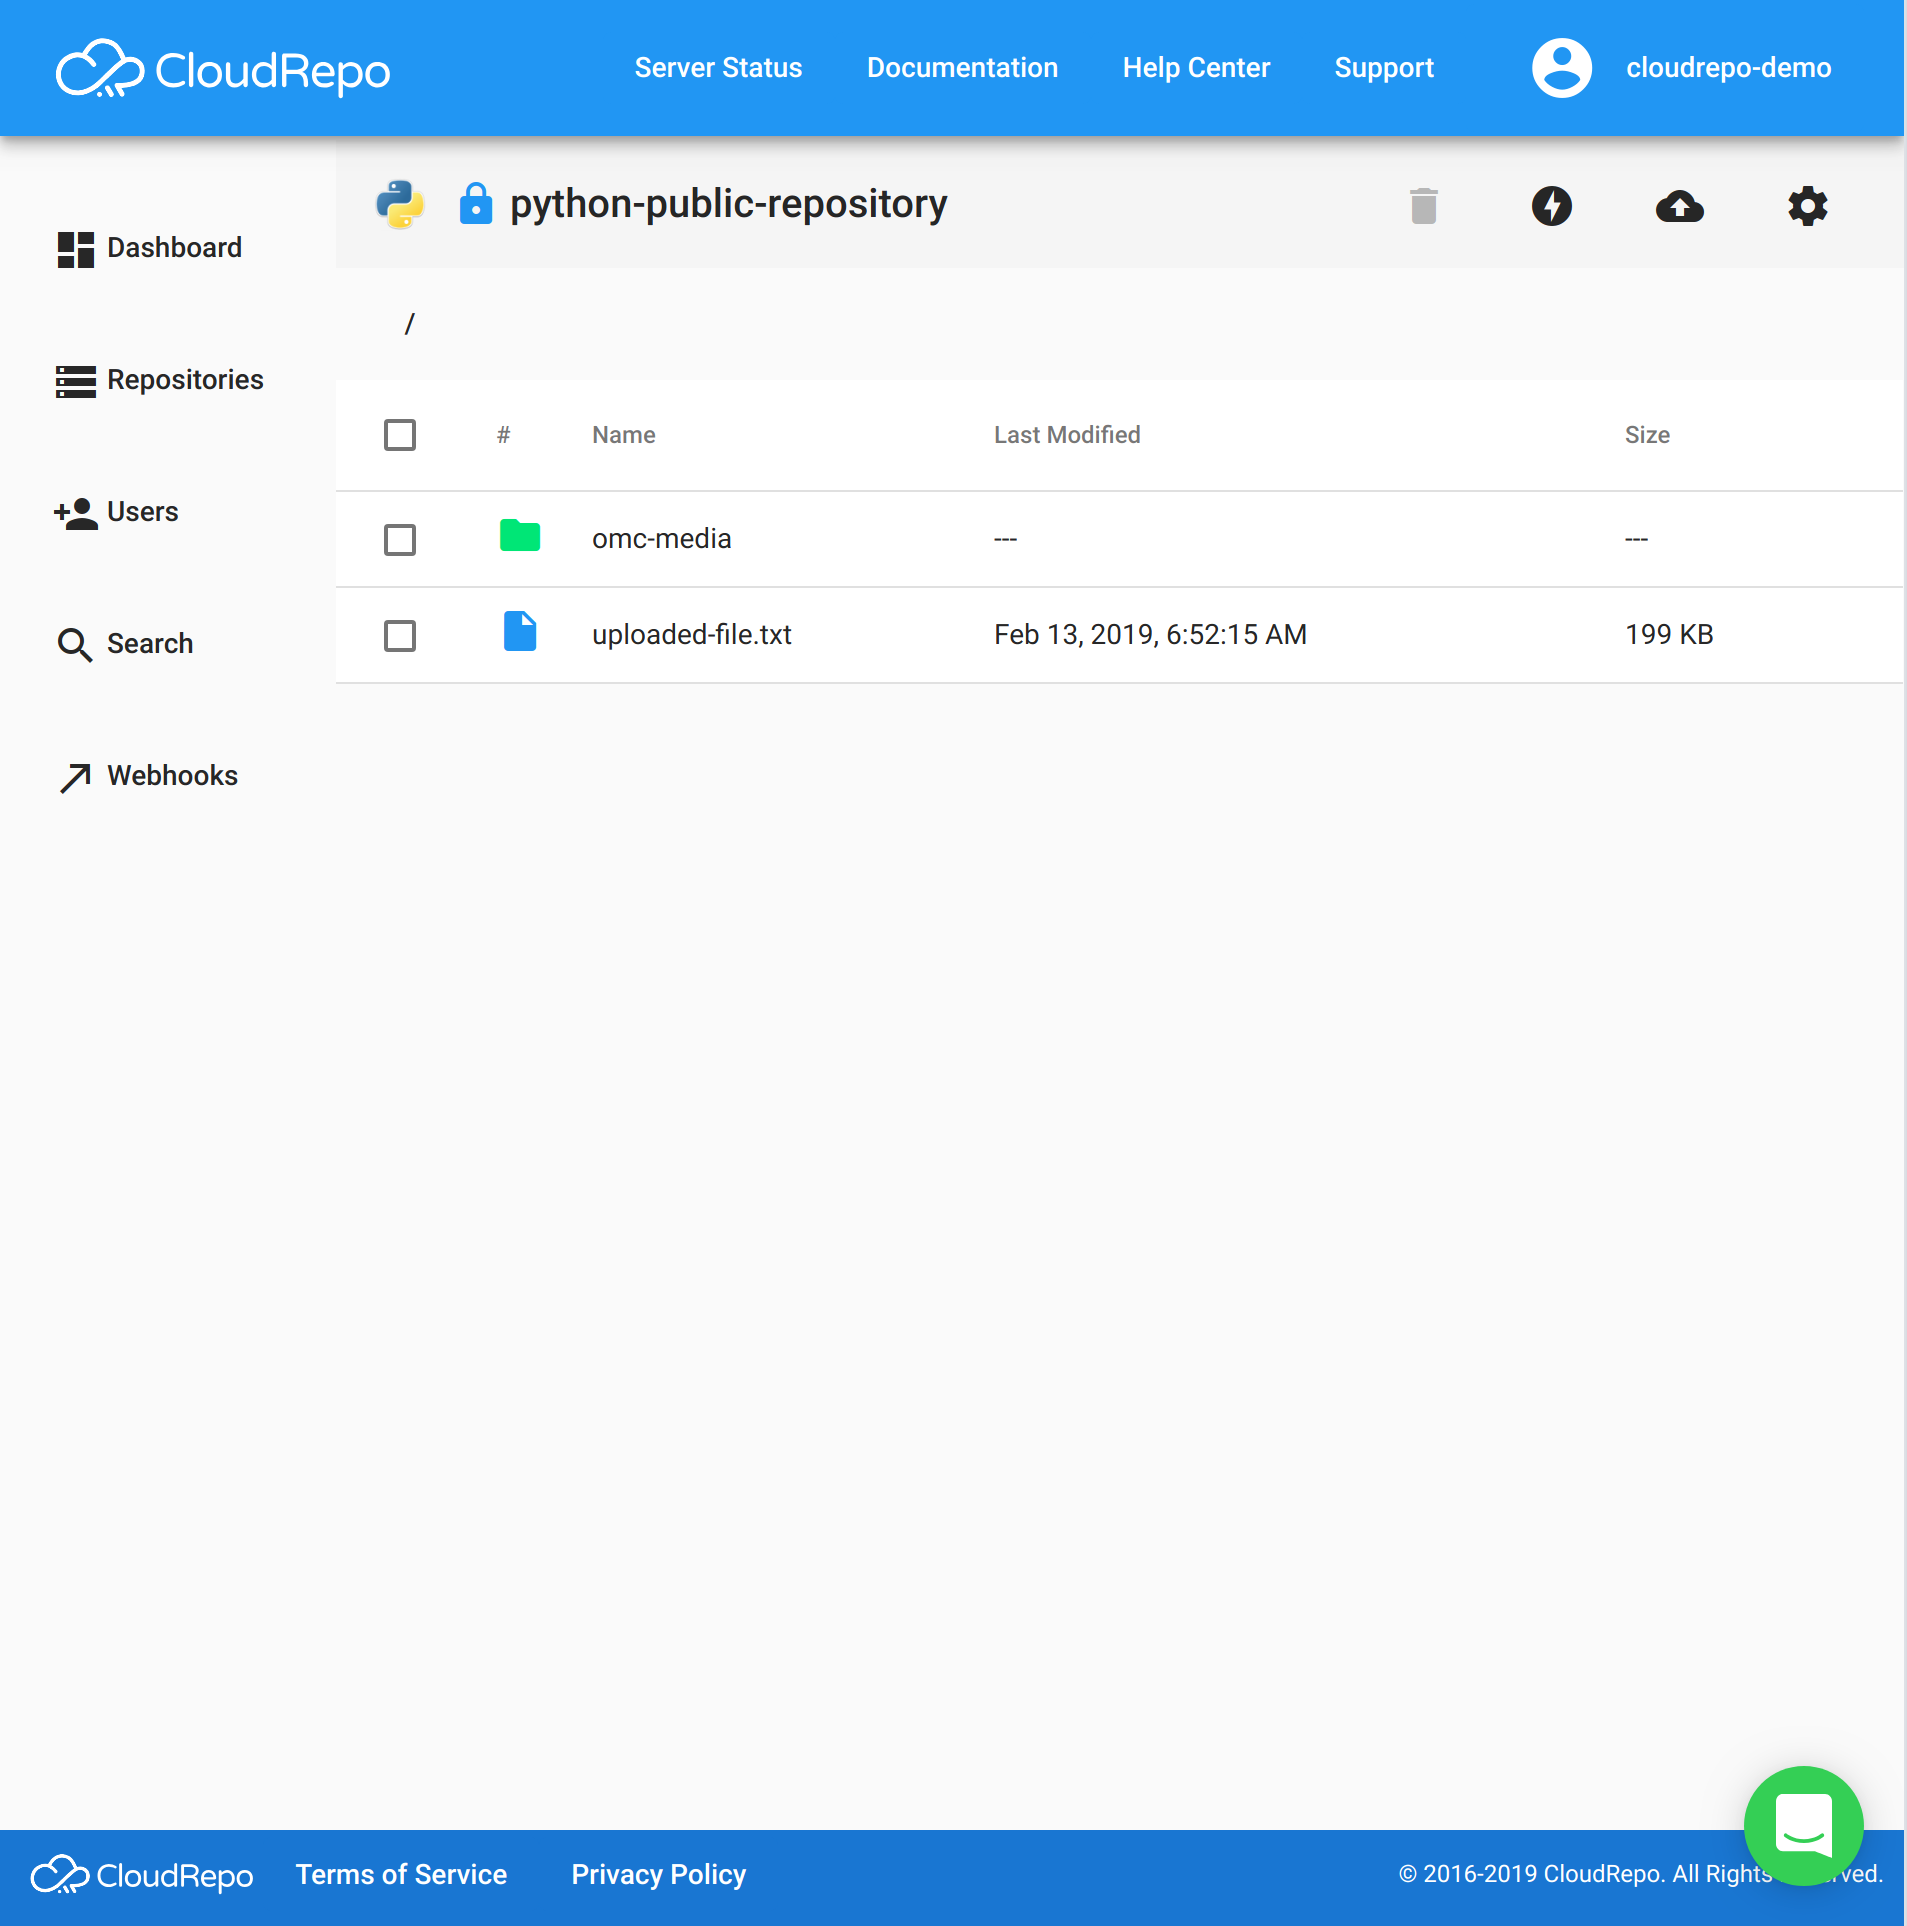
The repository overview screen allows you to view the contents of your repository in a familar, file tree browser.
From this view, you can see all files and directories, their update times, and file sizes.
Uploading Files
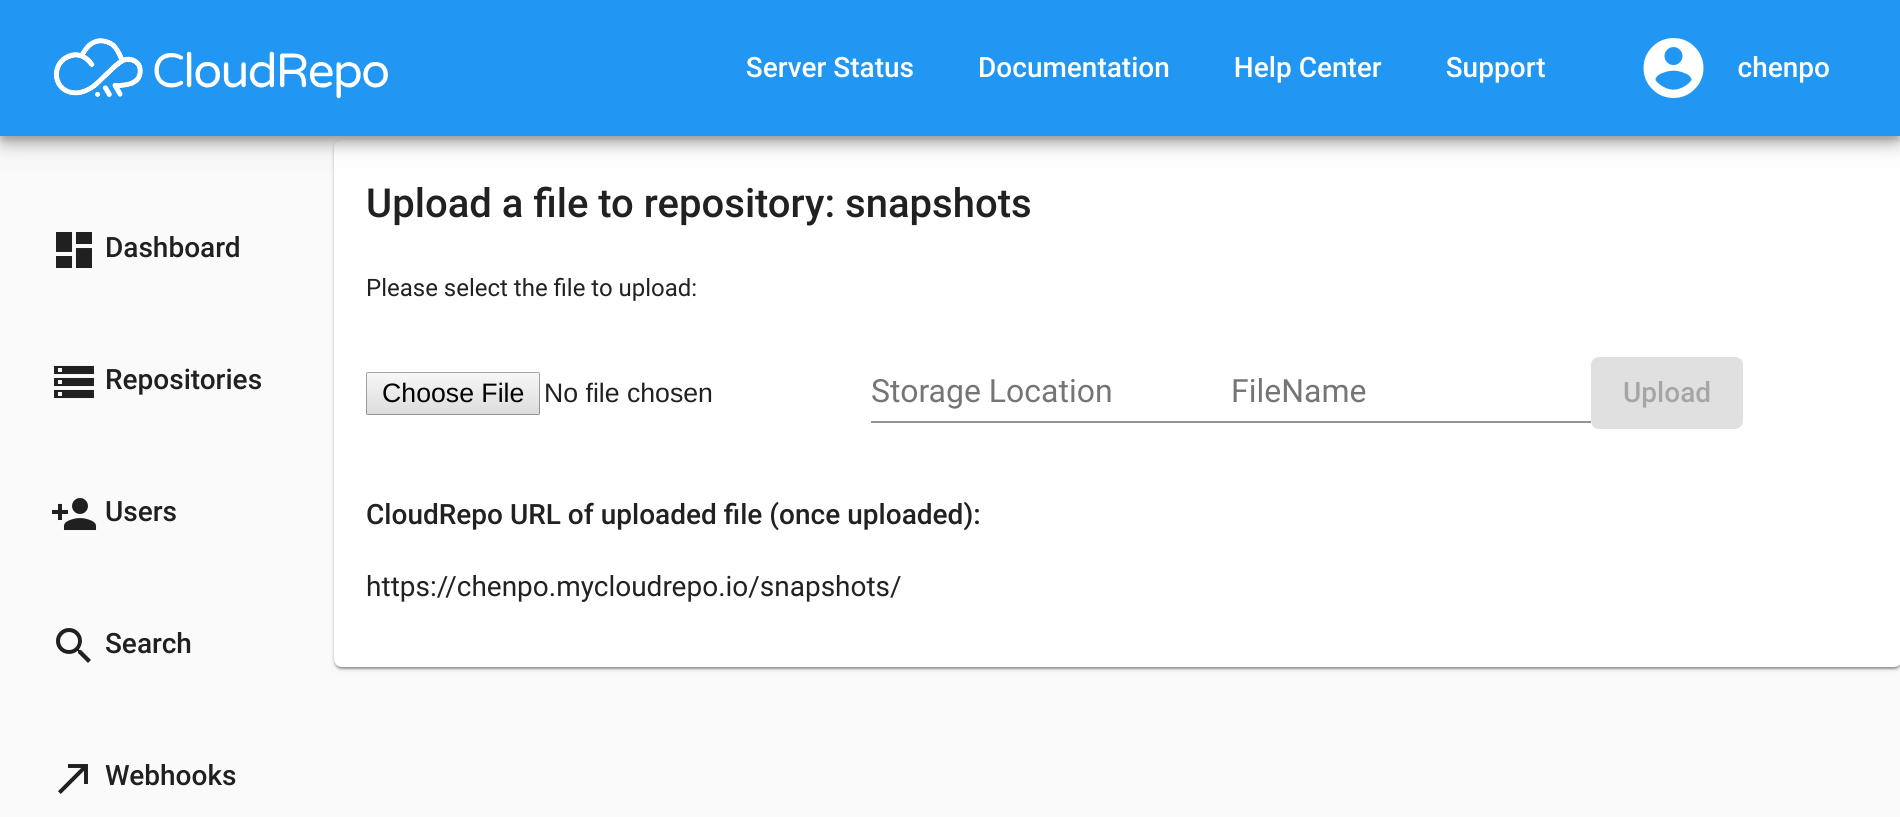
Uploading files to a repository can be done directly through the Admin Portal by selecting the ‘Upload a File’ icon in the Repository menubar.
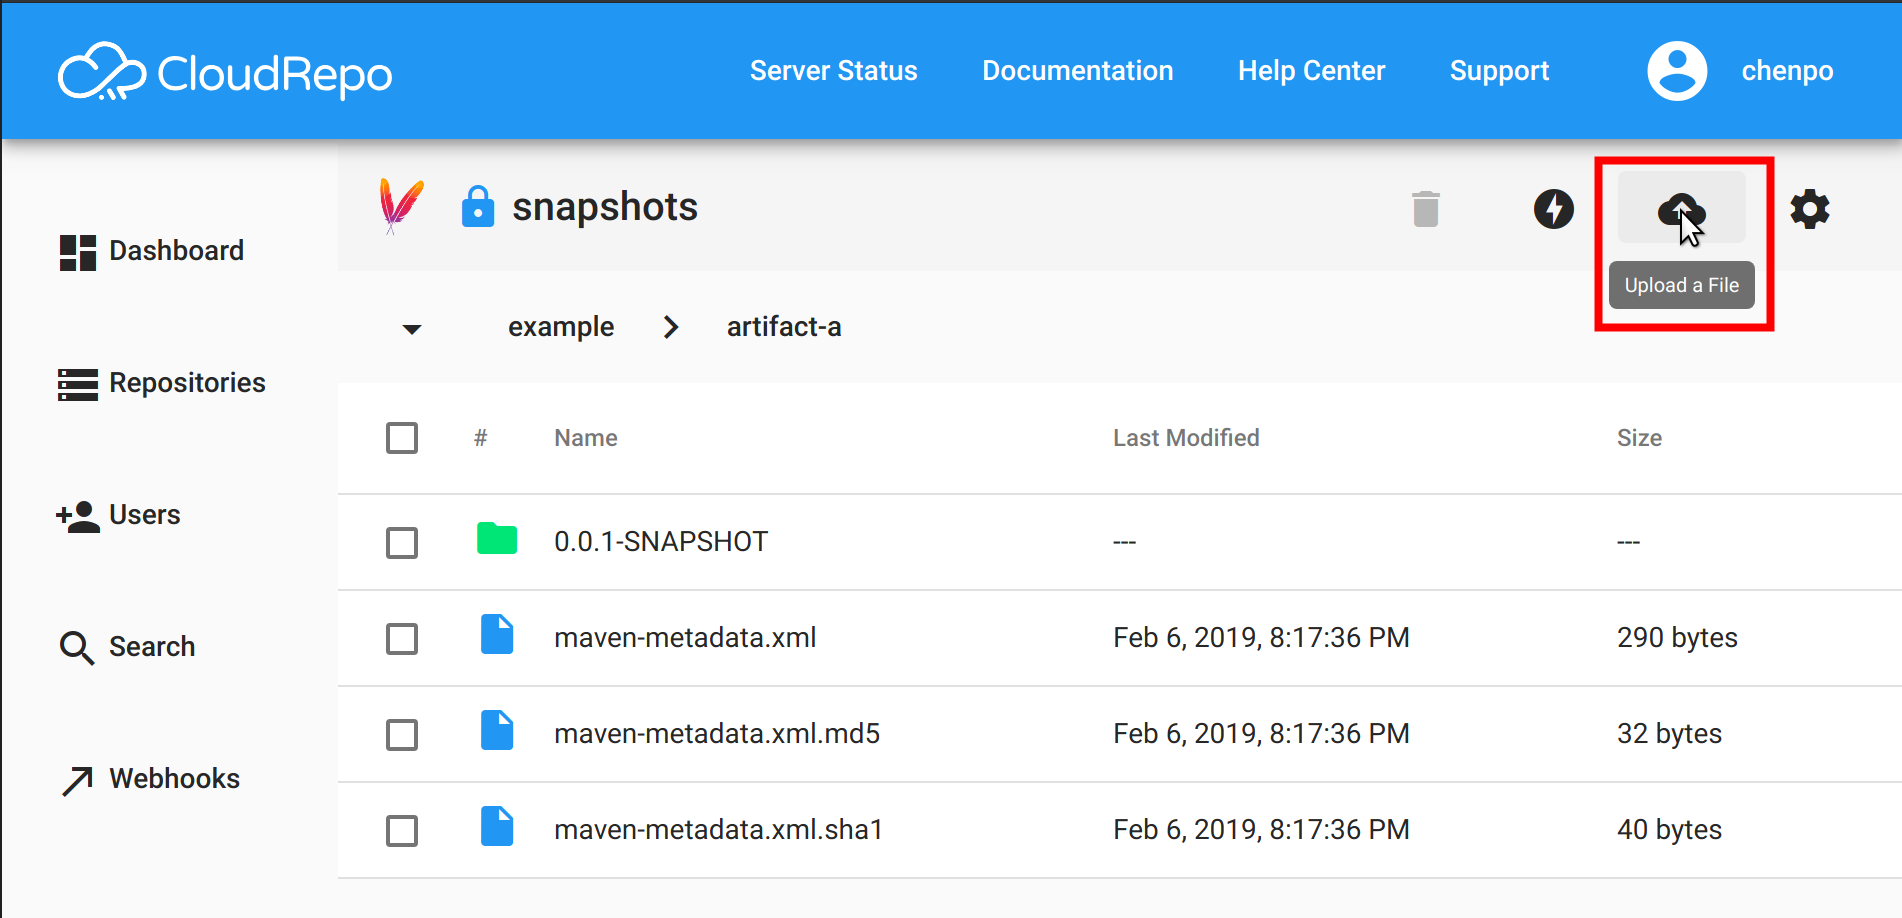
This brings you to a file picker where you can select the item on your computer that you wish to upload.
Downloading Files
To download a file, simply click on the row containing the file you desire. We’ll buffer the data on our servers then send it to you. This usually takes no more than a second or two, depending on the size of your file.
Viewing Folders
To view the contents of a folder, simply click on the row containing the folder and you’ll be sent to a new view containing its contents.
Navigating Directory Hierarchy
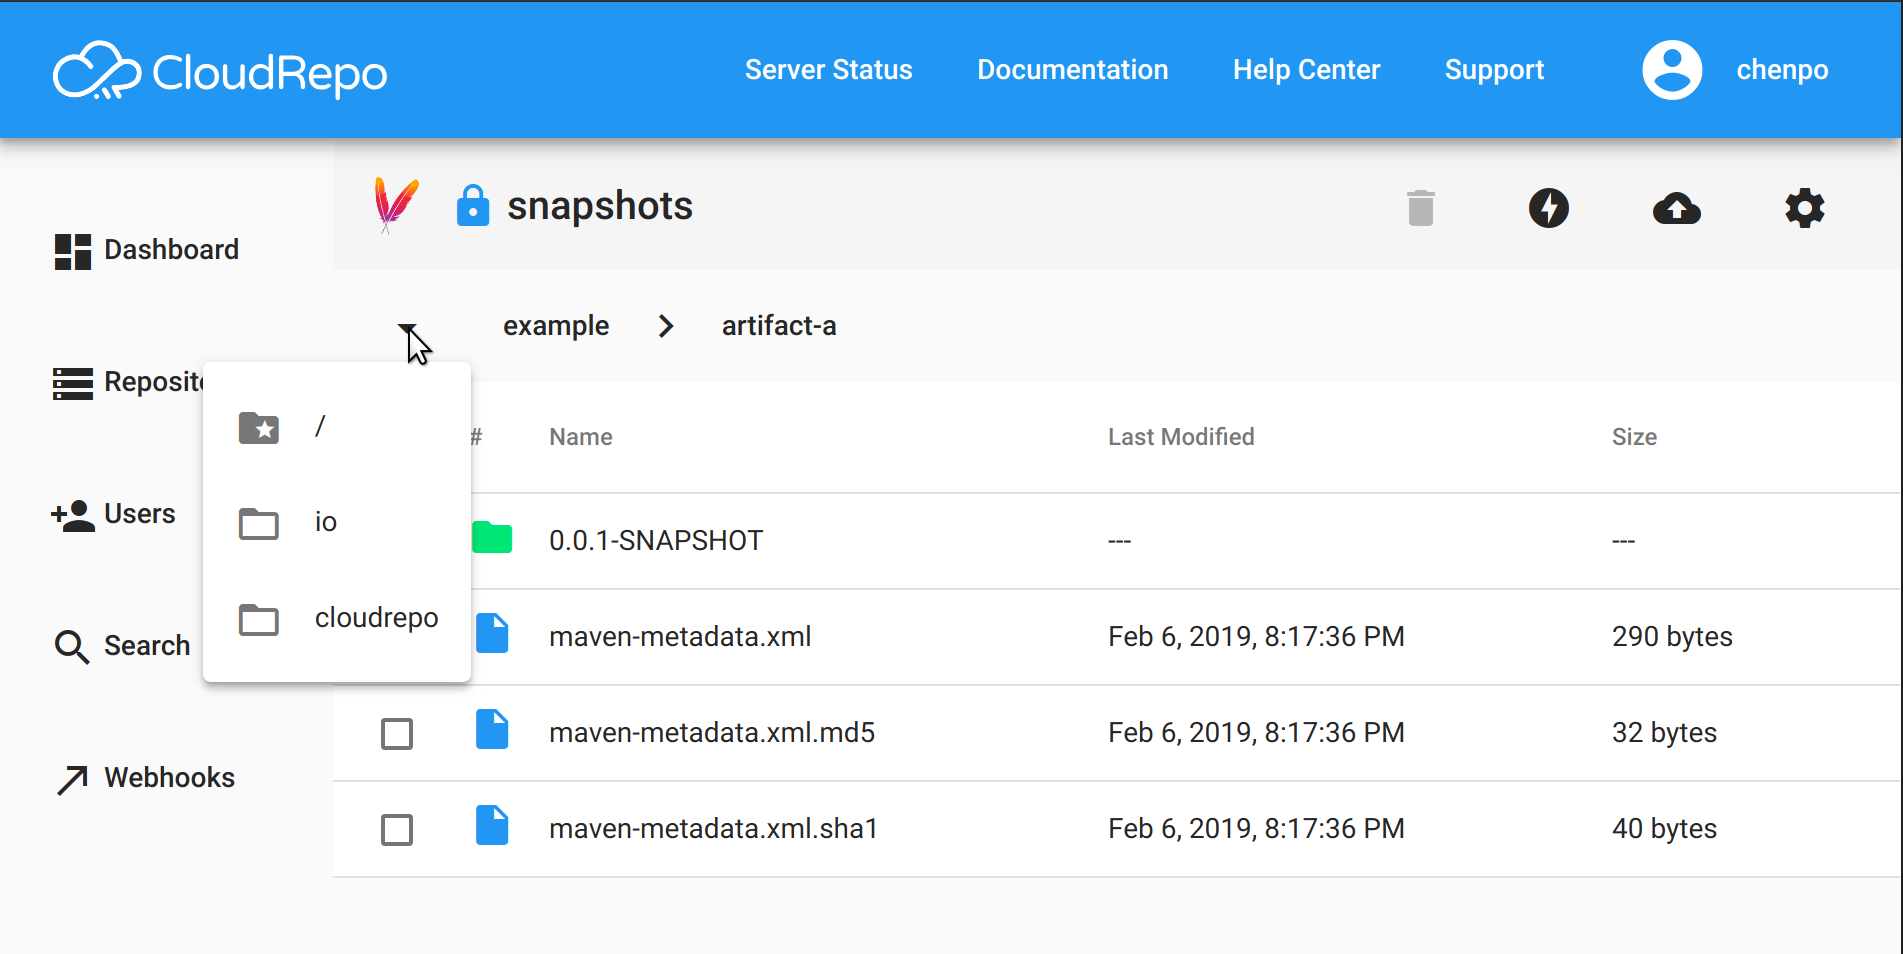
If you’re down in the depths of a file hierarchy and want to quickly navigate through the current path hierarchy, use the breadcrumbs located just above the file listings.
If you’ve gone more than two levels down, a drop down will appear that will make it easier to navigate.
Deleting Files and Folders
CloudRepo supports three deletion workflows, scaled to match how much you’re removing at once. Deleted items are moved to the repository’s trash and can be restored for 30 days before automatic cleanup.
Deleting a Single File or Folder
To delete an individual file or folder, hover over its row in the file browser and click the delete icon. A confirmation dialog appears showing the item’s name and explaining that it will be moved to trash and can be restored for 30 days.
Click Delete to confirm. The item is removed from the current view immediately.
Folder deletion is recursive: every file under the selected folder is moved to trash. For large folders, CloudRepo runs the deletion as a background job and displays a progress indicator in the file browser while it runs.
Bulk Delete
To delete multiple items in one action:
Check the selection box next to each file or folder you want to delete. The header checkbox toggles all items in the current view.
Click Delete Selected in the bulk action toolbar that appears at the top of the file browser.
A confirmation dialog summarizes the selection (item count and names).
CloudRepo requires a step-up password confirmation before bulk deletions begin, and this is the same password you use to log in. If your account has multi-factor authentication enabled, CloudRepo requires a TOTP code instead.
After you confirm, the bulk delete runs as a background job and a progress indicator shows how many items have been processed.
Bulk deletion over API tokens is supported without the step-up confirmation step so CI/CD pipelines can clean up artifacts without human intervention. See the API Contract for details.
Large Deletions Run Asynchronously
Whenever CloudRepo needs to delete more than a handful of files (deep folder trees, bulk selections, or cascade repository deletes), the operation runs as a background job:
You get immediate feedback in the UI
A progress indicator shows how many files have been processed
The file browser is usable during the job, so you can browse other folders or switch away and come back
If CloudRepo restarts mid-job, re-triggering the operation is safe, because S3 deletes are idempotent and already-removed files are skipped
Trash and Recovery
Every CloudRepo repository has a Trash tab alongside the Files tab. Any file deleted from the repository, whether from the UI, the API, or via a cascade repository delete, is moved to trash and retained for 30 days. After 30 days, CloudRepo automatically and permanently removes the file.
Finding the Trash
Open any repository from the repositories page and click the Trash tab. The trash view shows every file that’s currently recoverable, ordered by most recently deleted.
Each row displays:
File name (full repository path)
Size: how much storage the deleted file still occupies
Deleted: how long ago the file was moved to trash (e.g. “2 days ago”)
Deleted files in trash still count toward your organization’s storage usage until they’re permanently removed, either through the 30-day lifecycle rule or through an explicit purge by an organization owner.
Restoring a File
Click the Restore icon next to any item in the trash view. CloudRepo immediately returns the file to its original location in the repository. No step-up password is required for restore, because it’s a recoverable action.
If a file already exists at the same path in the repository (for example, you uploaded a new version after deleting the old one), CloudRepo returns an error. Remove or rename the newer file first, then retry the restore.
Permanently Deleting (Purging) a File
Organization owners can permanently purge a file from trash before the 30-day retention period elapses. Purge bypasses the safety net. Once purged, a file cannot be recovered through any CloudRepo workflow.
Click the Permanently delete icon next to the item you want to purge.
A confirmation dialog names the file and states that the action cannot be undone.
CloudRepo requires a step-up password confirmation: the same password you use to log in, or a TOTP code if MFA is enabled.
After you confirm, the file is immediately removed from S3 storage and no longer appears in trash.
Only organization owners can permanently purge files. Contributors and read-only users see a disabled purge button.
Frequently Asked Questions
Can I change the 30-day retention period?
Not today. 30 days is fixed for all repositories and cannot be customized. Configurable retention is on the roadmap.
Can I restore files in bulk?
Not today. Files must be restored one at a time from the trash view. Bulk restore is on the roadmap.
Do trashed files count against my storage quota?
Yes. Deleted files in trash still occupy S3 storage until they’re purged (manually or automatically at the 30-day mark). The storage calculator includes them in your tenant’s total usage.
What happens to webhooks when I delete or restore a file?
CloudRepo fires the same file-deleted / file-restored webhook event
types whether the action came from the UI or the API. Your webhook
subscribers receive events in both directions so downstream systems stay in
sync.
If I delete a repository, do its files stay in trash?
No. Cascade repository delete permanently removes every file in the repository as part of the delete. There is no trash intermediary because the parent repository no longer exists to browse trash from.
View Connection Settings
To view repository specific connection settings, or instructions for connecting your clients to CloudRepo, simply click the ‘Connection Information’ button located in the repository menu.
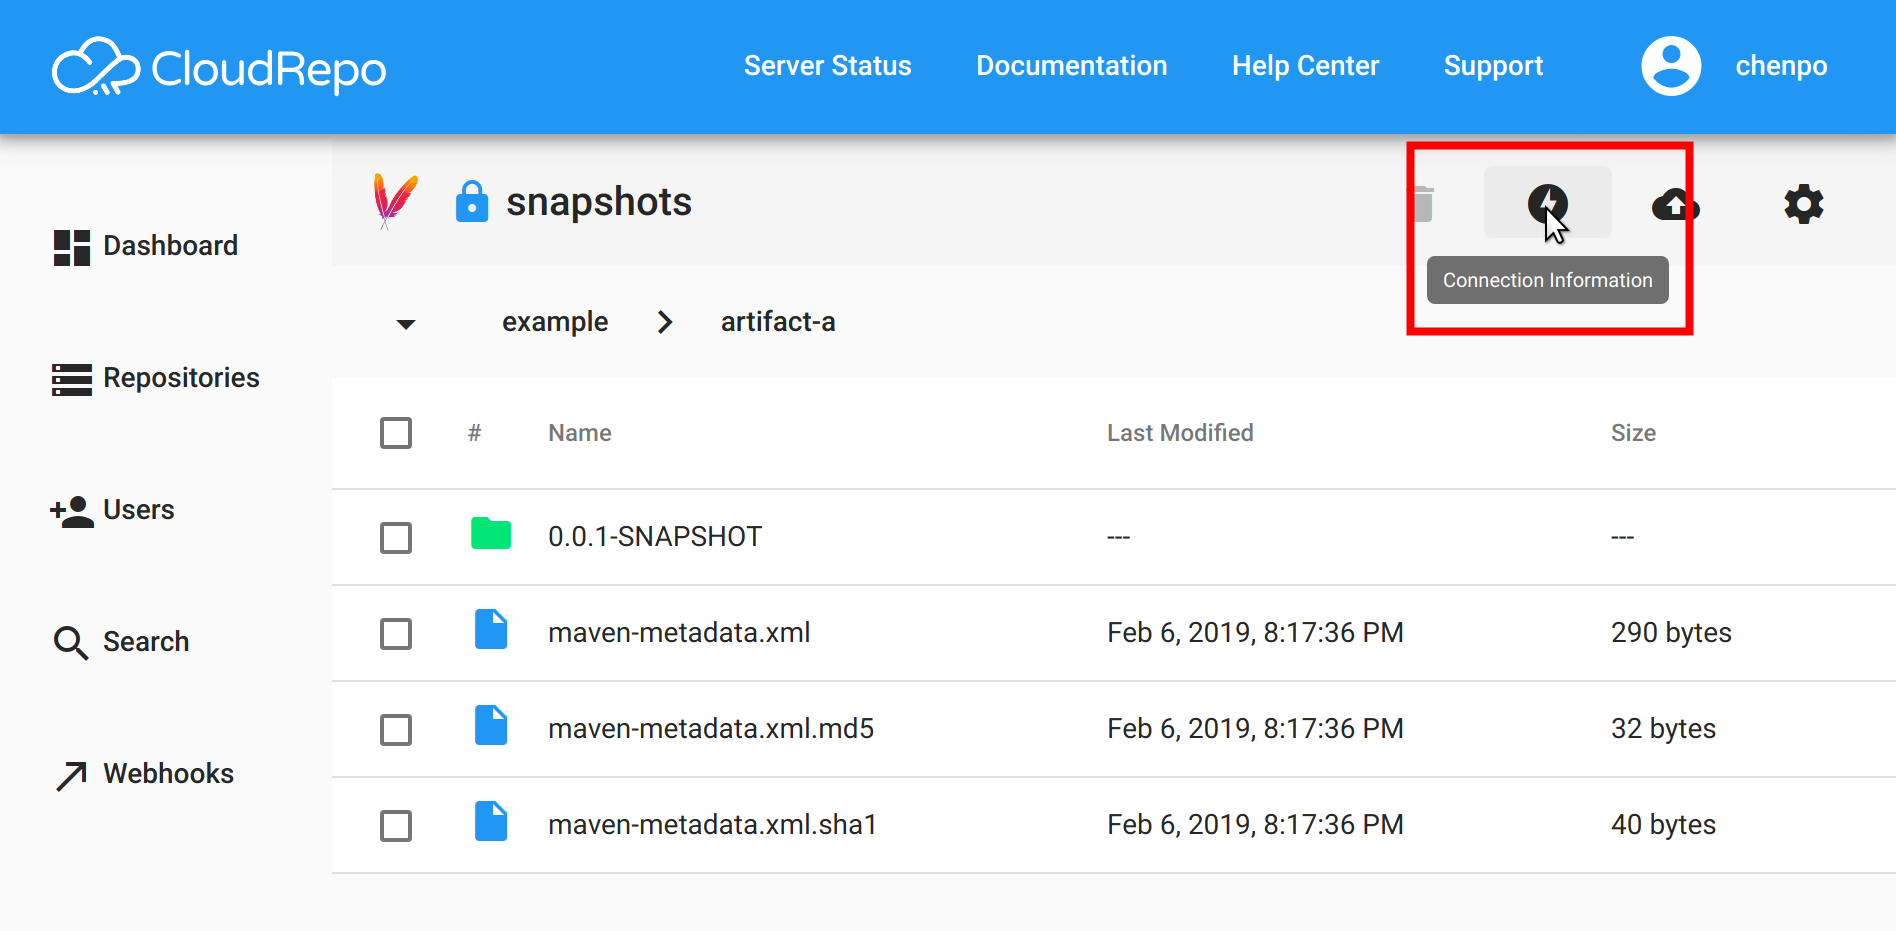
The information provided in this screen will be as close to customized for your repository as possible. You will still have to substitute appropriate values for placeholders where indicated.
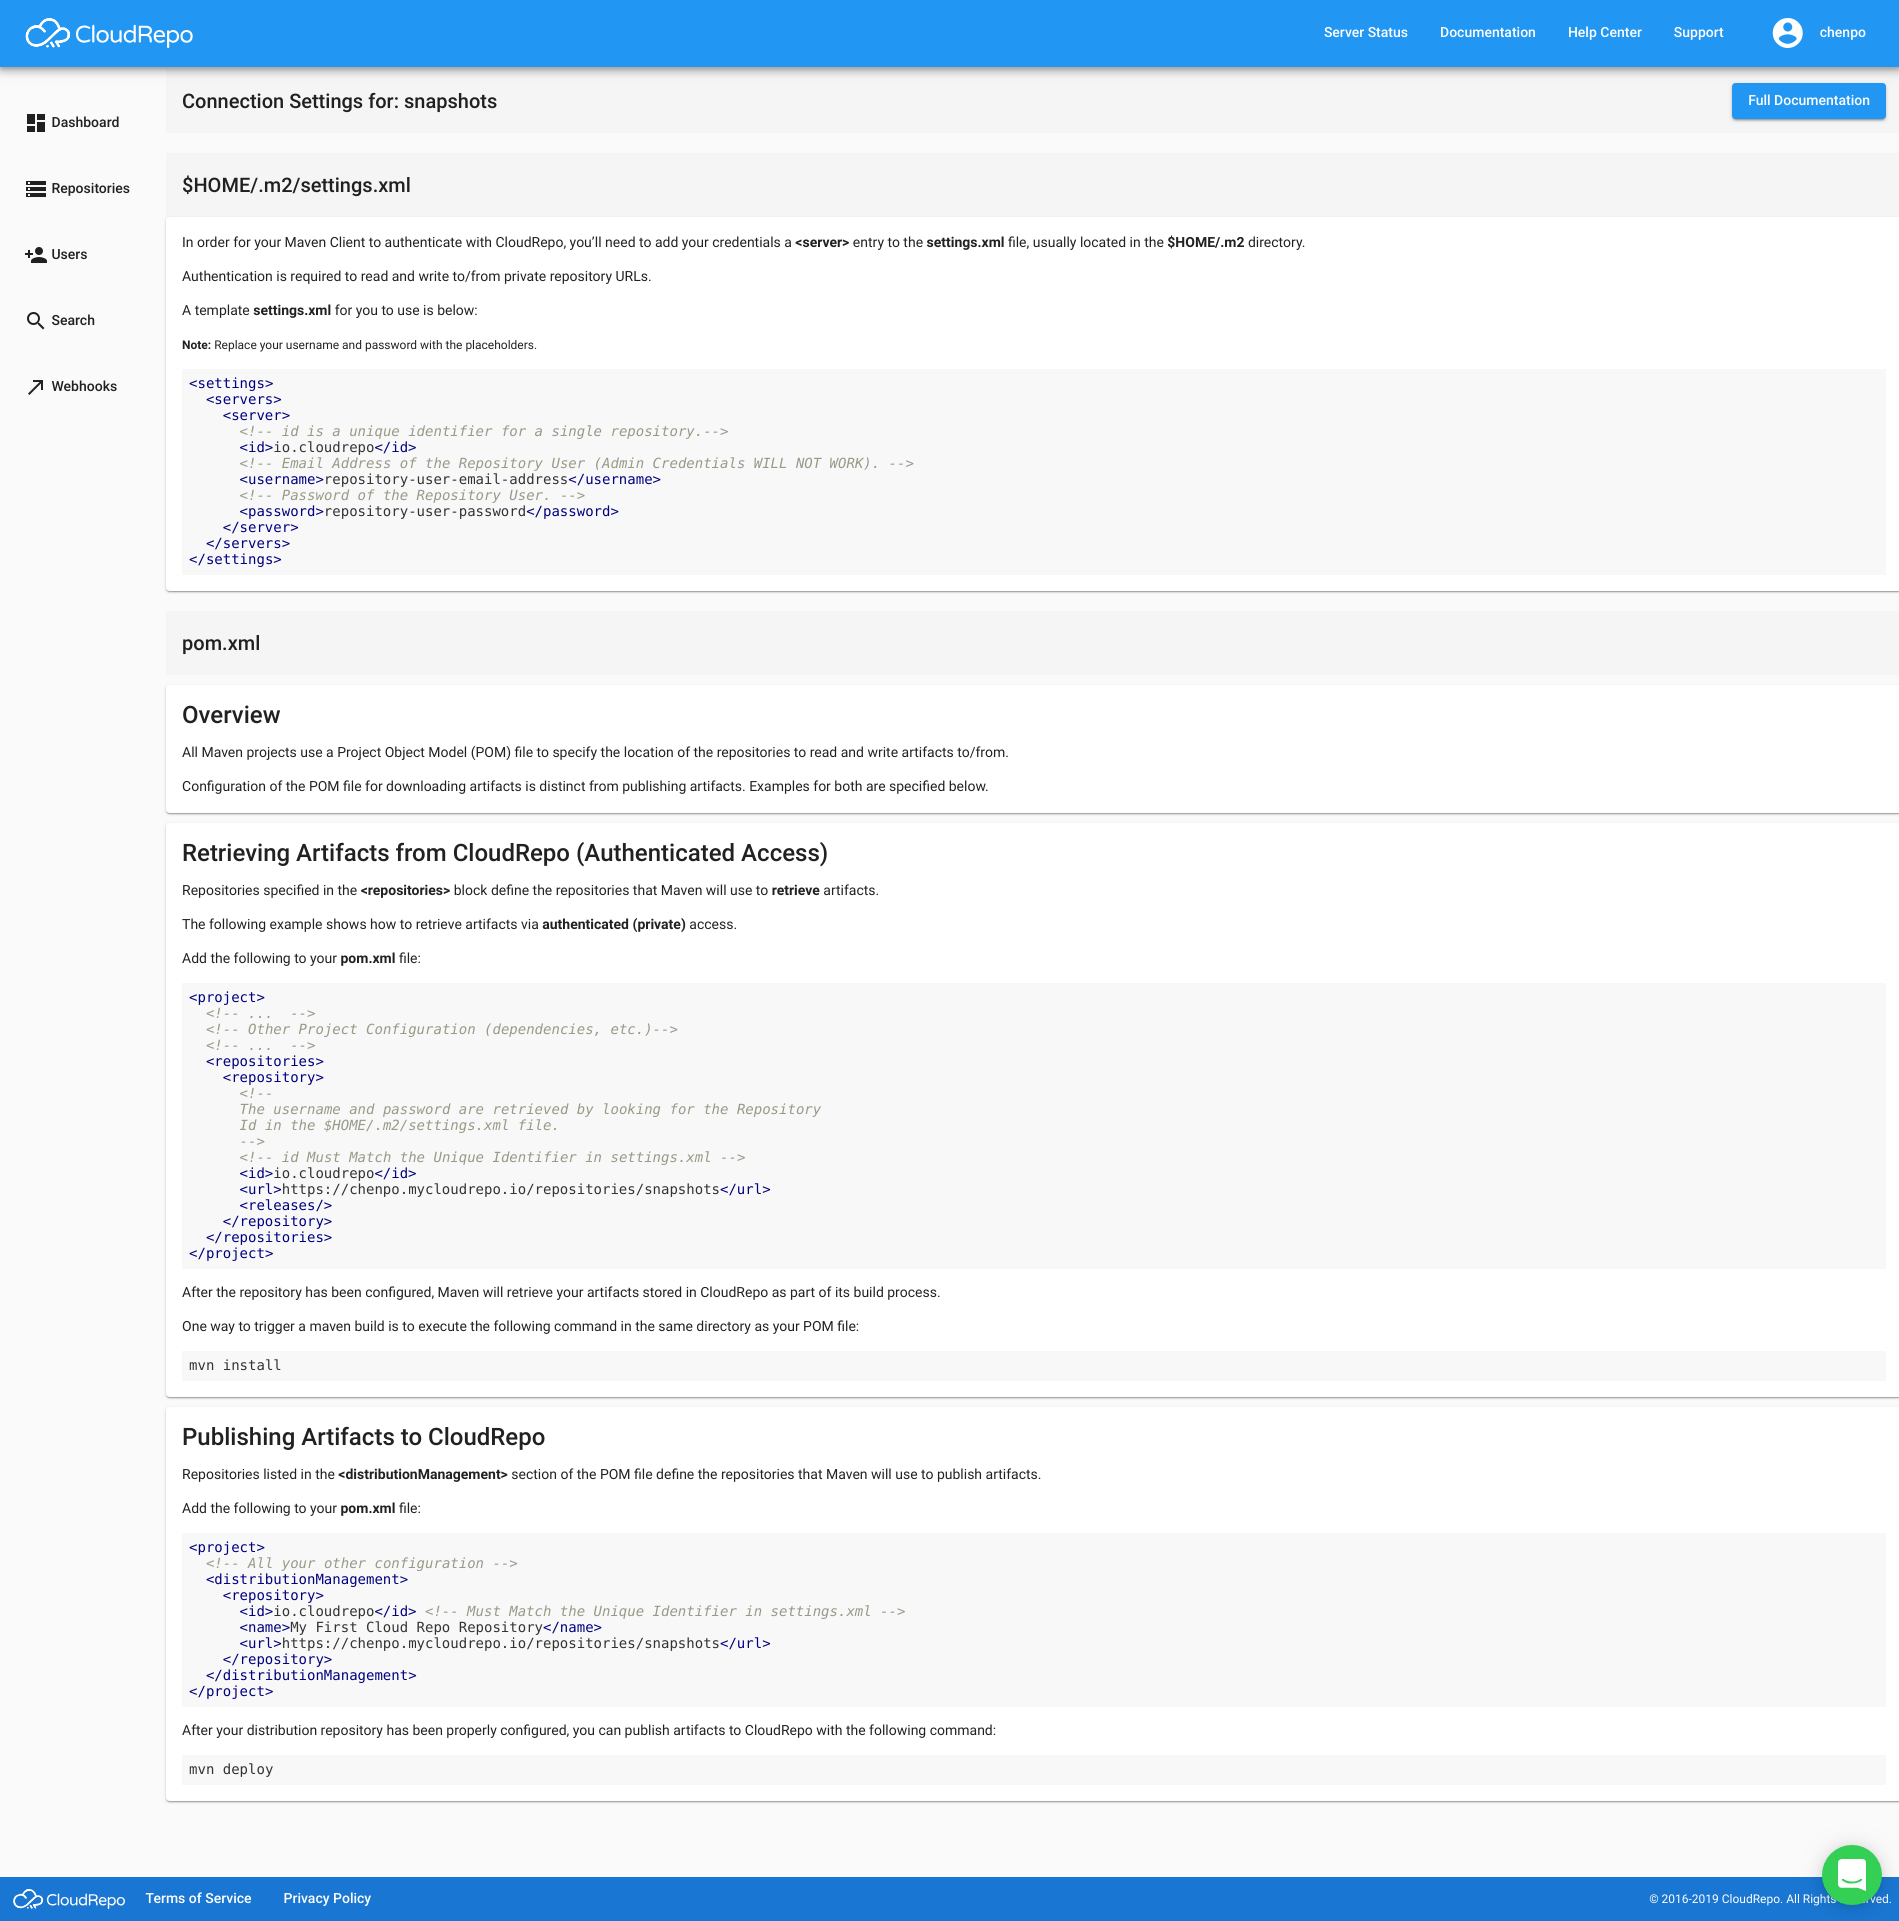
Example: Maven Connection Settings
Here’s an example of how the Connection Settings will appear for a Maven Repository:
Example: Python Connection Settings
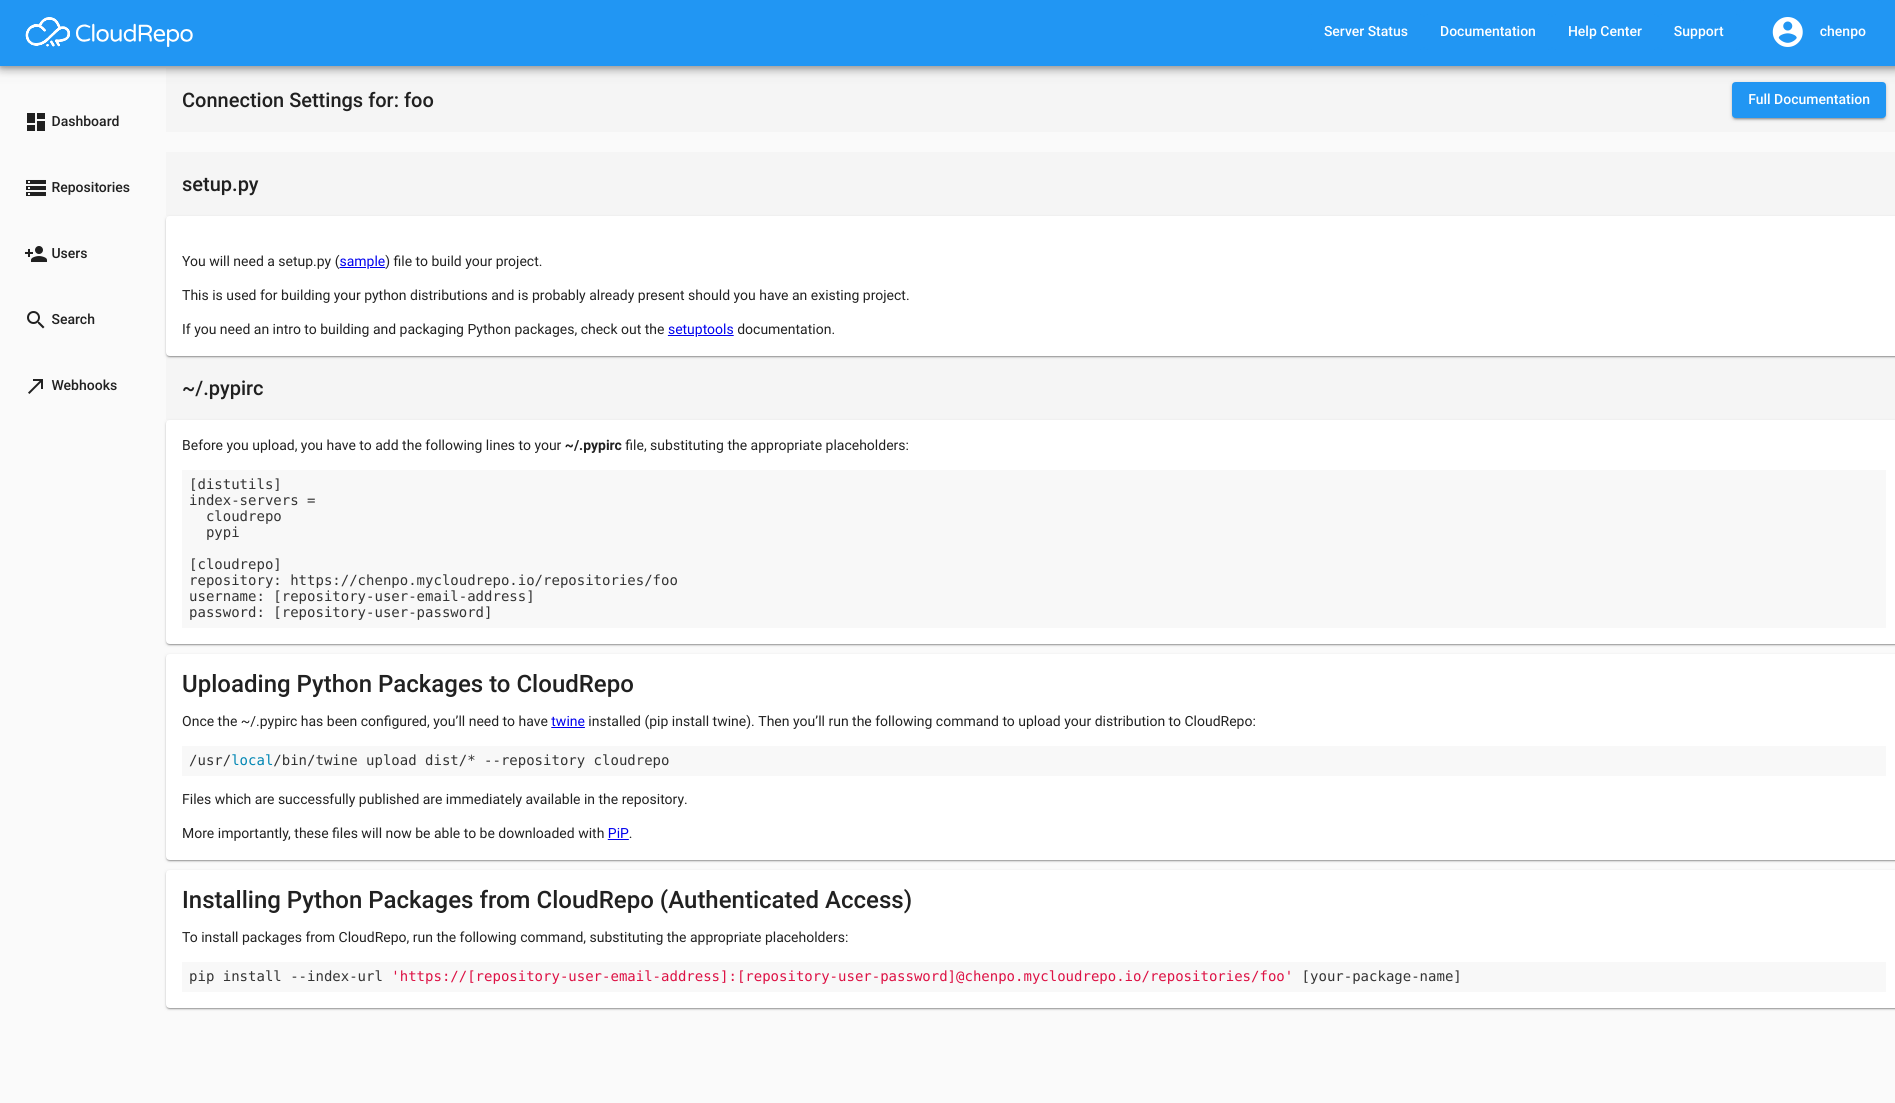
Here’s an example of how the Connection Settings will appear for a Python Repository:
Repository Settings
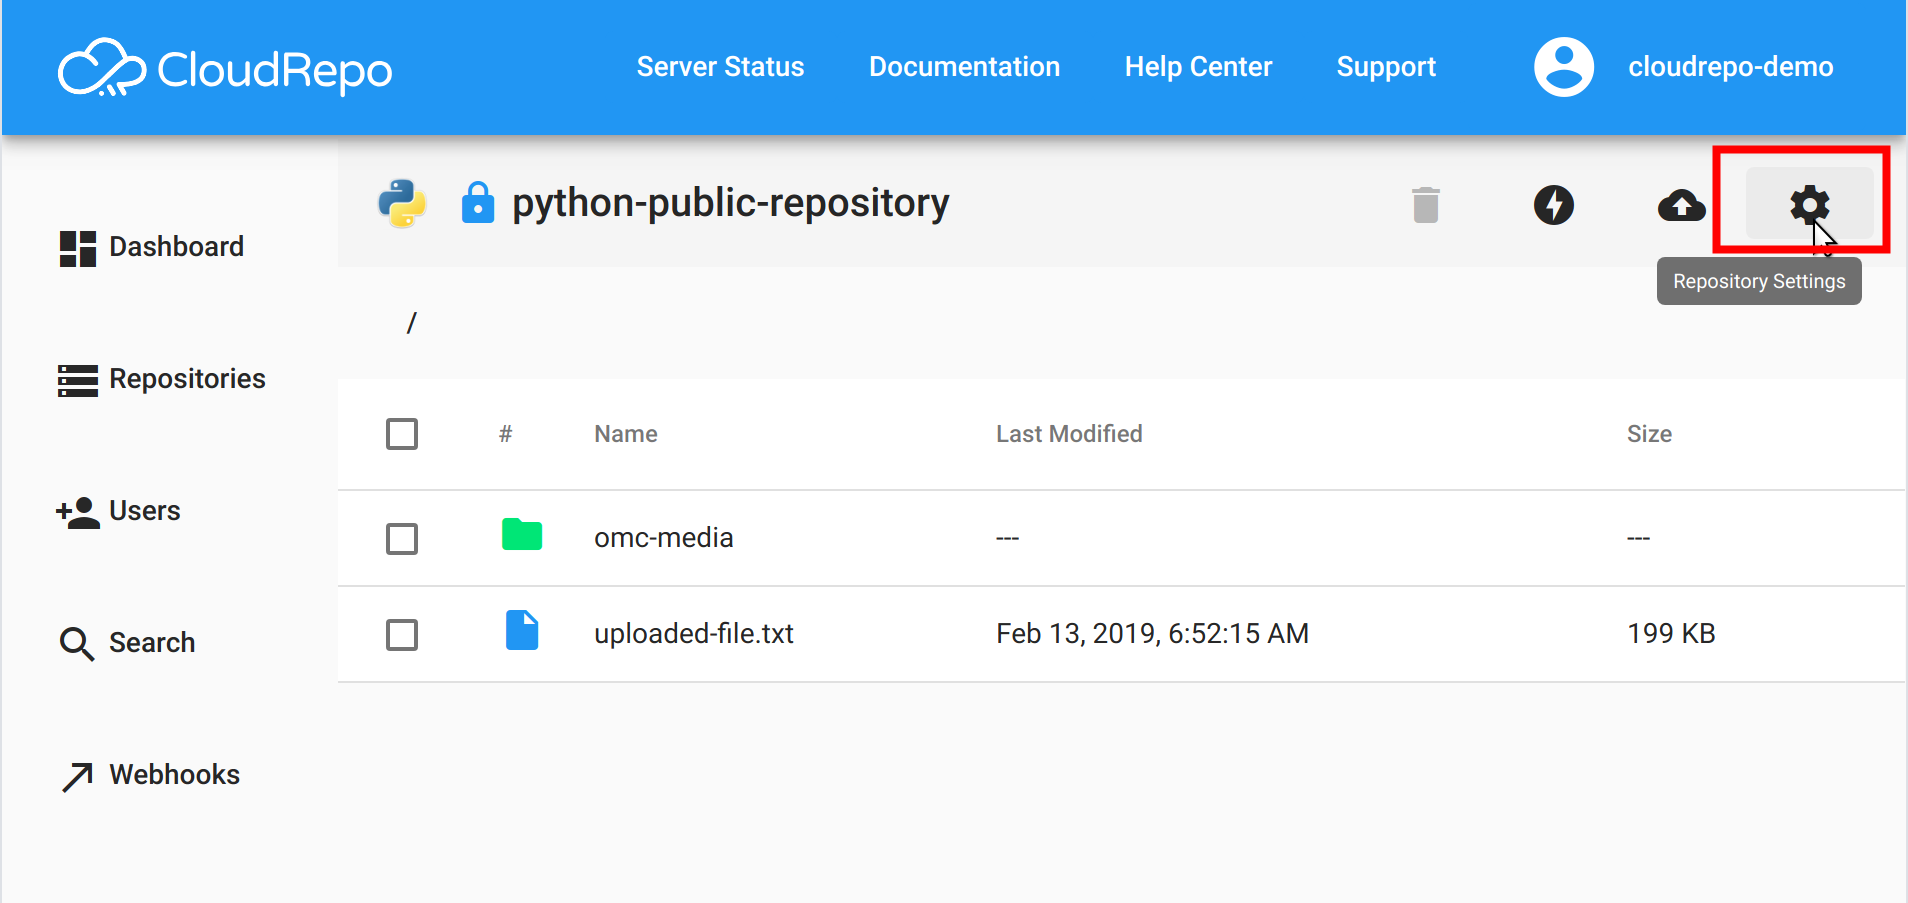
Each repository has its own set of settings that can be configured.
Access a repository’s settings by clicking the ‘Repository Settings’ in the menu.
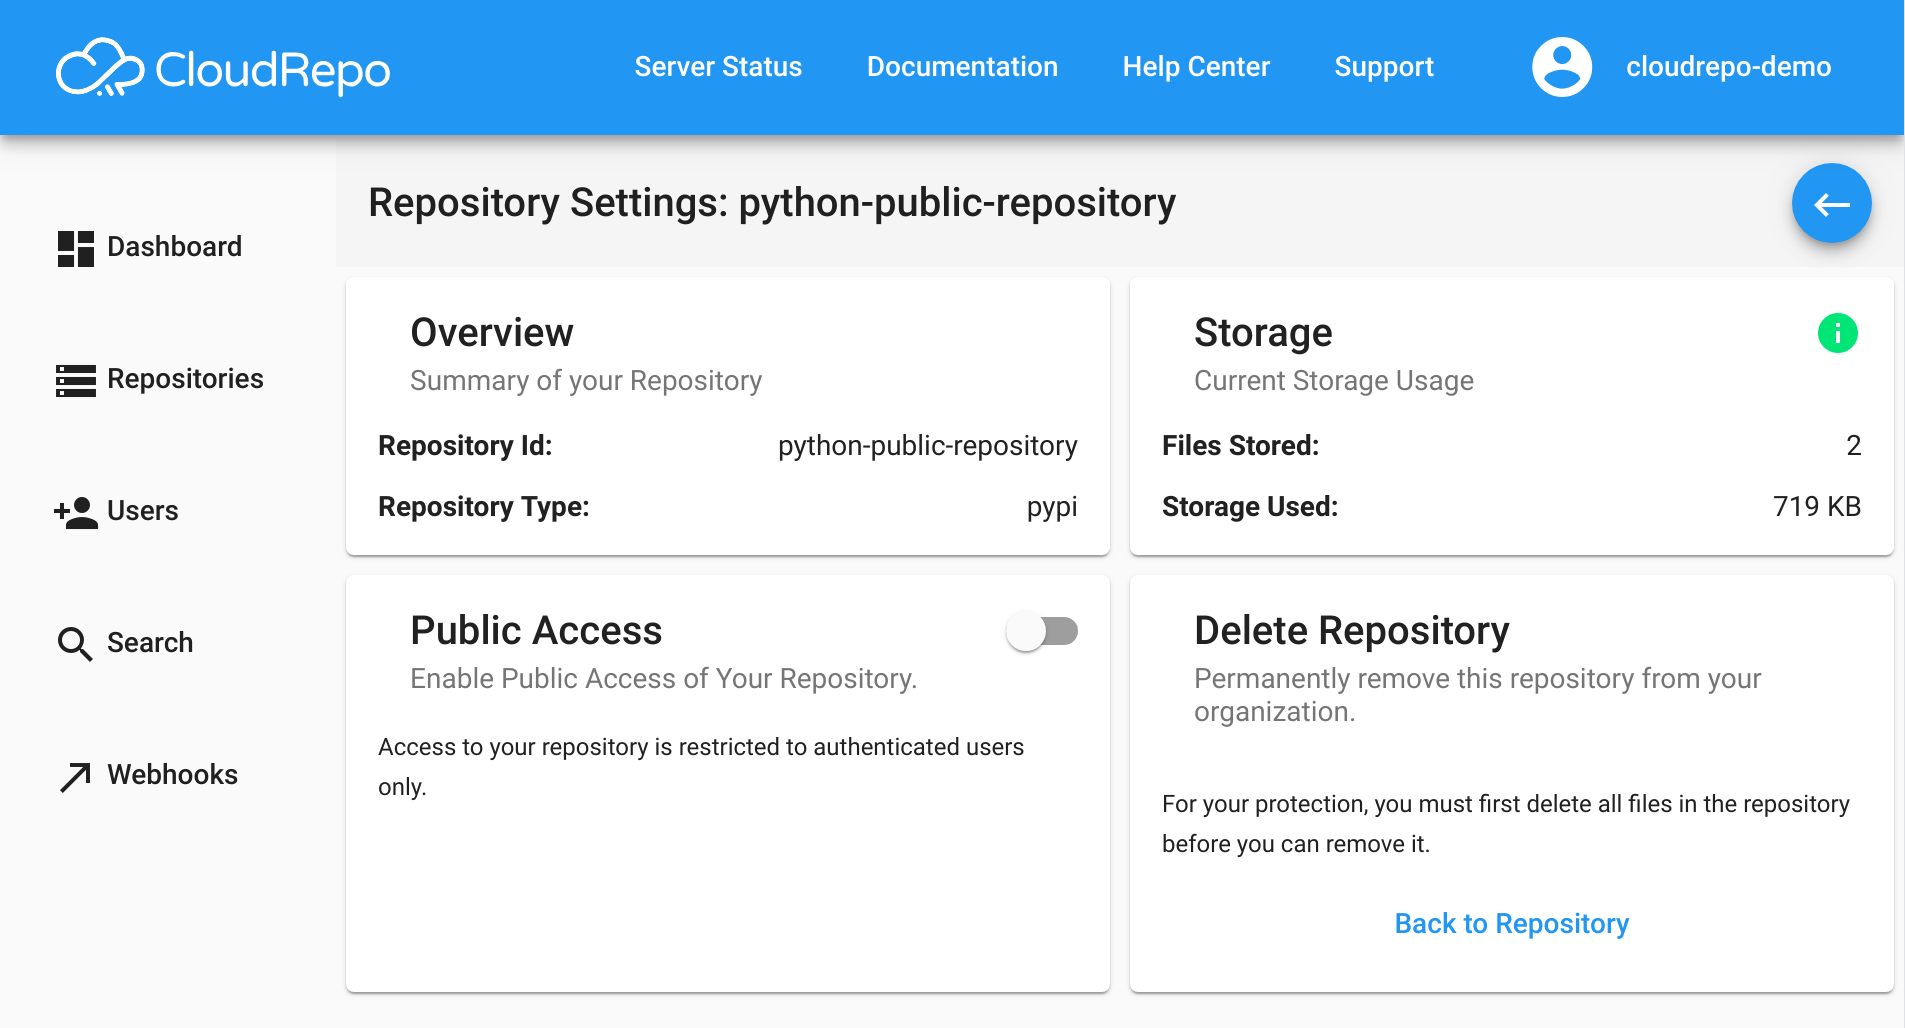
Once you click this button, the settings for a repository will appear.
Enabling Public Repository Access
By default, all repositories are private and require authentication to access.
Public repositories are accessible to anyone on the internet, without authentication.
Enabling public access is as simple as clicking the toggle on the ‘Public Access’ card.
To disable public access (switch back to private), simply set the toggle back to the off position.
Overwrite Protection
Overwrite Protection is the default on every Maven, Python and npm
repository. Any repository that has not explicitly turned it off is protected,
whenever it was created. When it is enabled, a publish that would replace a file
already stored at the same path is refused with 409 Conflict and the file
already in the repository is left untouched: the request is rejected before any
bytes are written.
Overwrite Protection is a per-repository setting, not a platform-wide guarantee. Turn it off from the Overwrite Protection card in the repository’s settings and that repository will accept overwrites again. The card states which mode the repository is currently in.
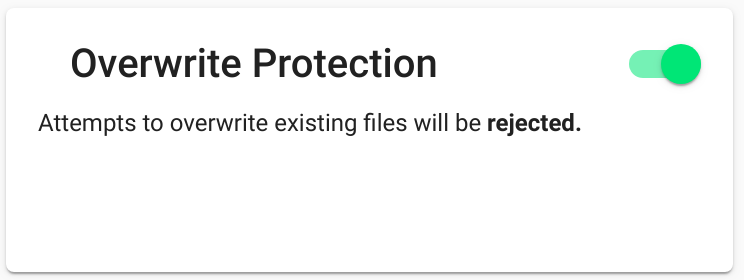
In the above image, Overwrite Protection is enabled and overwrites will be rejected.
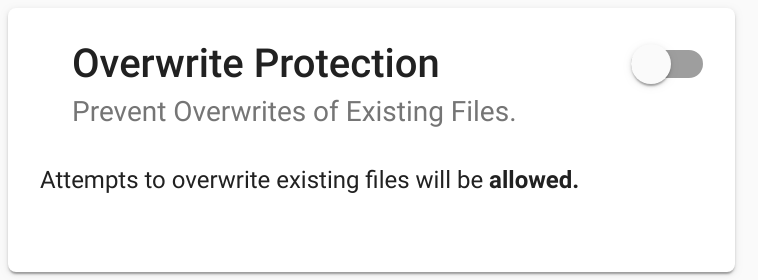
In the above image, Overwrite Protection is disabled and overwrites will be allowed.
What Overwrite Protection Covers
Overwrite Protection applies to the package-manager publish APIs (mvn
deploy, gradle publish, twine upload, npm publish) and to file
uploads through the Admin Portal.
It refuses a write that would replace a file already present at the same path. It is not a retention policy: a file you delete through the portal or the API is deleted whether or not Overwrite Protection is enabled.
What a Refused Write Looks Like
CloudRepo answers a refused write with 409 Conflict and an explanation in
the response body. How much of that reaches you depends entirely on which
client you are using, and the difference is large enough to be worth stating.
npm and Python clients show the message. Both read the response body and
print it, so a refused npm publish or twine upload says in as many
words that the version already exists and that overwrites are disabled for the
repository.
Maven does not. mvn deploy reports only the HTTP status and its reason
phrase, so the entire explanation you get is:
status code: 409, reason phrase: Conflict
The body CloudRepo sends is not displayed. This is the Maven client’s behaviour, not a fault in the server or a sign of a broken repository: the publish was refused on purpose, by a policy setting, and the terse message is simply all Maven prints for any 409. If you are troubleshooting a Maven or Gradle publish, see Maven Overwrite Protection for what to do about it.
Maven: SNAPSHOT and Metadata Are Exempt
On Maven repositories, the publish API exempts two things that Maven itself re-authors on every publish, so a protected repository still behaves the way Maven and Gradle expect:
SNAPSHOT versions. Any file published under a version directory ending in
-SNAPSHOTmay always be overwritten. This covers both the plain form (app-1.0.0-SNAPSHOT.jar) and the unique/timestamped form (app-1.0.0-20260101.120000-1.jar).The metadata index.
maven-metadata.xml, along with its own checksum and signature sidecars (.md5,.sha1,.sha256,.sha512,.asc). These index files are rewritten every time a new version is published.
A checksum or signature sidecar that belongs to an artifact, such as
app-1.0.0.jar.sha1, is not exempt. It is written once alongside its
release and is protected along with it.
These two exemptions belong to the Maven publish API. A file upload through the Admin Portal is refused whenever a file already exists at that path, SNAPSHOT or not.
Python and npm repositories have no equivalent notion of a mutable version, so Overwrite Protection there applies to every file in the repository.
Docker Repositories
Docker repositories do not offer Overwrite Protection, and the card does not appear in their settings. Docker addresses content by digest rather than by path, so the equivalent control is tag immutability, a separate capability that CloudRepo does not offer today.
Recovering an Overwritten File
If Overwrite Protection is turned off for a repository and a file is overwritten, the previous copy is retained by S3 versioning and can be restored by contacting support. Recovery is available for 30 days from the moment the file was replaced; after that a storage lifecycle rule permanently removes the superseded version.
Delete a Repository
CloudRepo supports deleting repositories directly, including repositories that still contain files. This is called a cascade delete: CloudRepo empties the repository as part of the delete workflow, then removes the repository itself.
To delete a repository:
Open the repository’s Settings tab.
Click Delete Repository.
A confirmation dialog appears asking you to type the full repository ID to confirm. This guards against accidental clicks.
If the repository has files in it, check the Also delete all files option. Without this option, an attempt to delete a non-empty repository returns an error.
CloudRepo requires a step-up password confirmation before destructive repository actions: your login password, or a TOTP code if MFA is enabled.
After you confirm, the repository enters a
deletingstate. Writes are blocked but read operations continue so in-flight downloads finish cleanly. A background job removes all files, then the repository itself is removed.
Cascade delete is a permanent operation. Unlike individual file delete, cascade-deleted files are not placed in trash. The parent repository ceases to exist, so there is no trash to browse.
Cascade delete is intentionally restricted to interactive users. API tokens
cannot trigger a cascade delete and receive a
403 "Cascade delete requires interactive authentication" response. This
limits the blast radius of compromised or misconfigured automation.
Other Options
Other cards and options may be present in the Repository Settings. These will be specific to the storage technology type of the repository (Maven or Python). These will be documented in the specific documentation.