Repository Tokens: Create One and Authenticate
A repository token is the credential your build tools send to CloudRepo. Other tools call the same thing an access token or an API token. You create it in the admin portal, choose which repositories it reaches and whether it can publish, and paste it into Maven, Gradle, npm, pip, twine or Docker in place of a password.
Every repository token:
- reaches only the repositories you tick when you create it;
- is Read only (download) or Read + write (download, publish and delete);
- expires when you choose: 90, 180 or 365 days after you create it, on any date up to 31 December 9999, or never (the default is 90 days);
- is shown once, when you create it, and starts with
crp_v1_; - can be revoked on its own, without changing your password or your other tokens.
This page uses four placeholders. your-org is your organization’s name, the first part of your
repository host: for acme.mycloudrepo.io it is acme. your-repo is the repository’s
name as it appears in the admin portal. you@example.com stands for your email address, and
YOUR_REPOSITORY_TOKEN for the token. Never commit a real token to version control. Type your
organization and repository here, and every example on this page uses them:
The Credential Every Client Sends
Section titled “The Credential Every Client Sends”| Client | Username | Password or token |
|---|---|---|
| Maven, Gradle, pip, twine, Poetry, uv, curl | Your email address: the email of the account that created the token | The repository token |
| npm | None | The repository token, as _authToken in .npmrc |
Docker (docker login) |
Your email address (CloudRepo’s registry does not check it) | The repository token |
The username is your email address, not the token’s name and not a placeholder. Capital letters
do not matter. For the clients that send a username (Maven, Gradle, pip, twine, Poetry, uv, curl
and npm _auth), a username of __token__, token, or anything other than the email address of
the account that created the token is refused with 401 Unauthorized. (__token__ is the
convention on pypi.org; CloudRepo does not use it.) CloudRepo’s registry does not check the Docker
username; use your email address there anyway.
Create a Token in the Admin Portal
Section titled “Create a Token in the Admin Portal”-
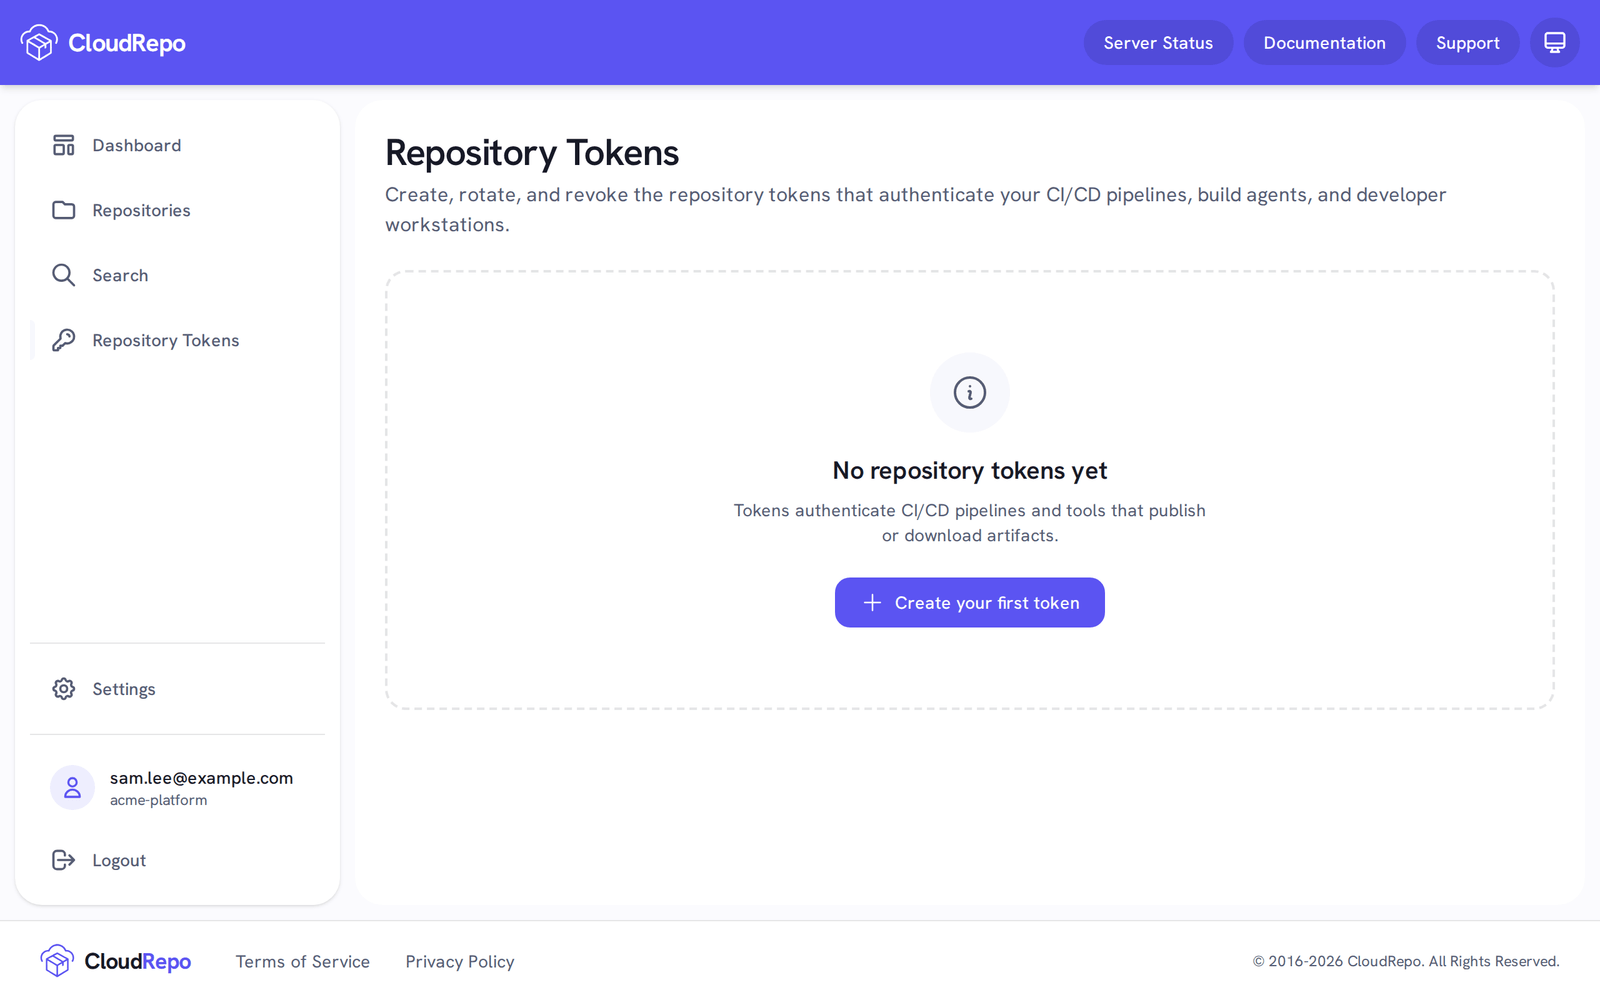
Sign in to the CloudRepo Admin Portal as the user whose builds will use the token, and in the sidebar, click Repository Tokens.
Expected: the Repository Tokens page. If you have no tokens yet, it shows No repository tokens yet.
-
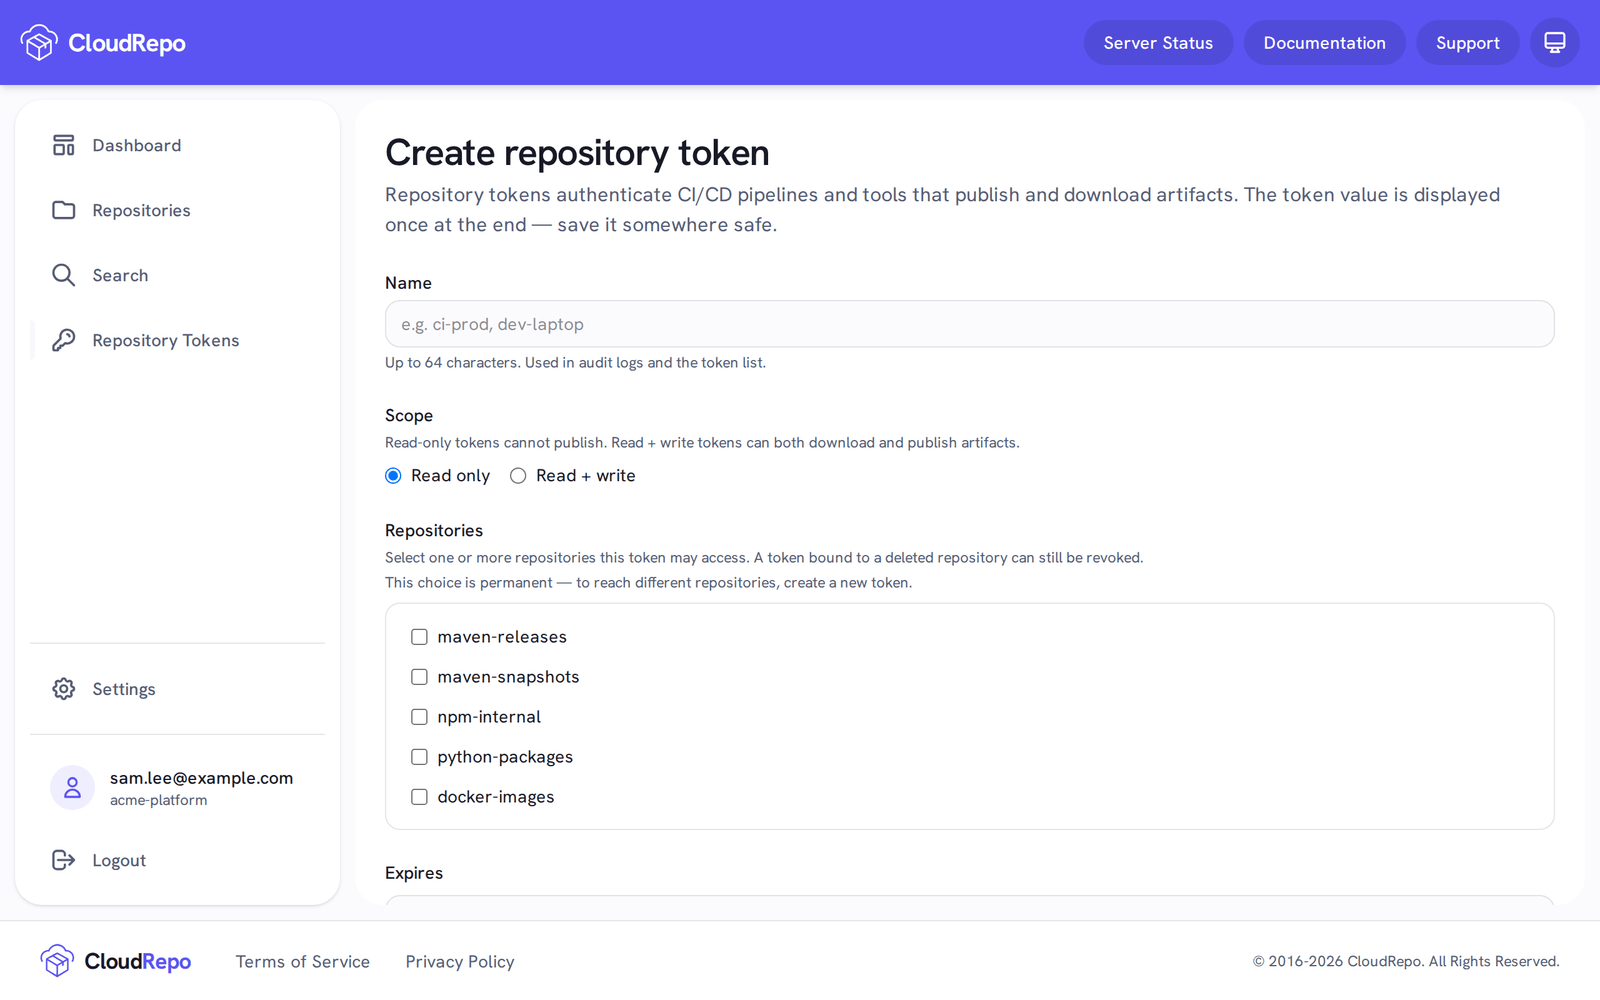
Click Create token, or Create your first token if you have none.
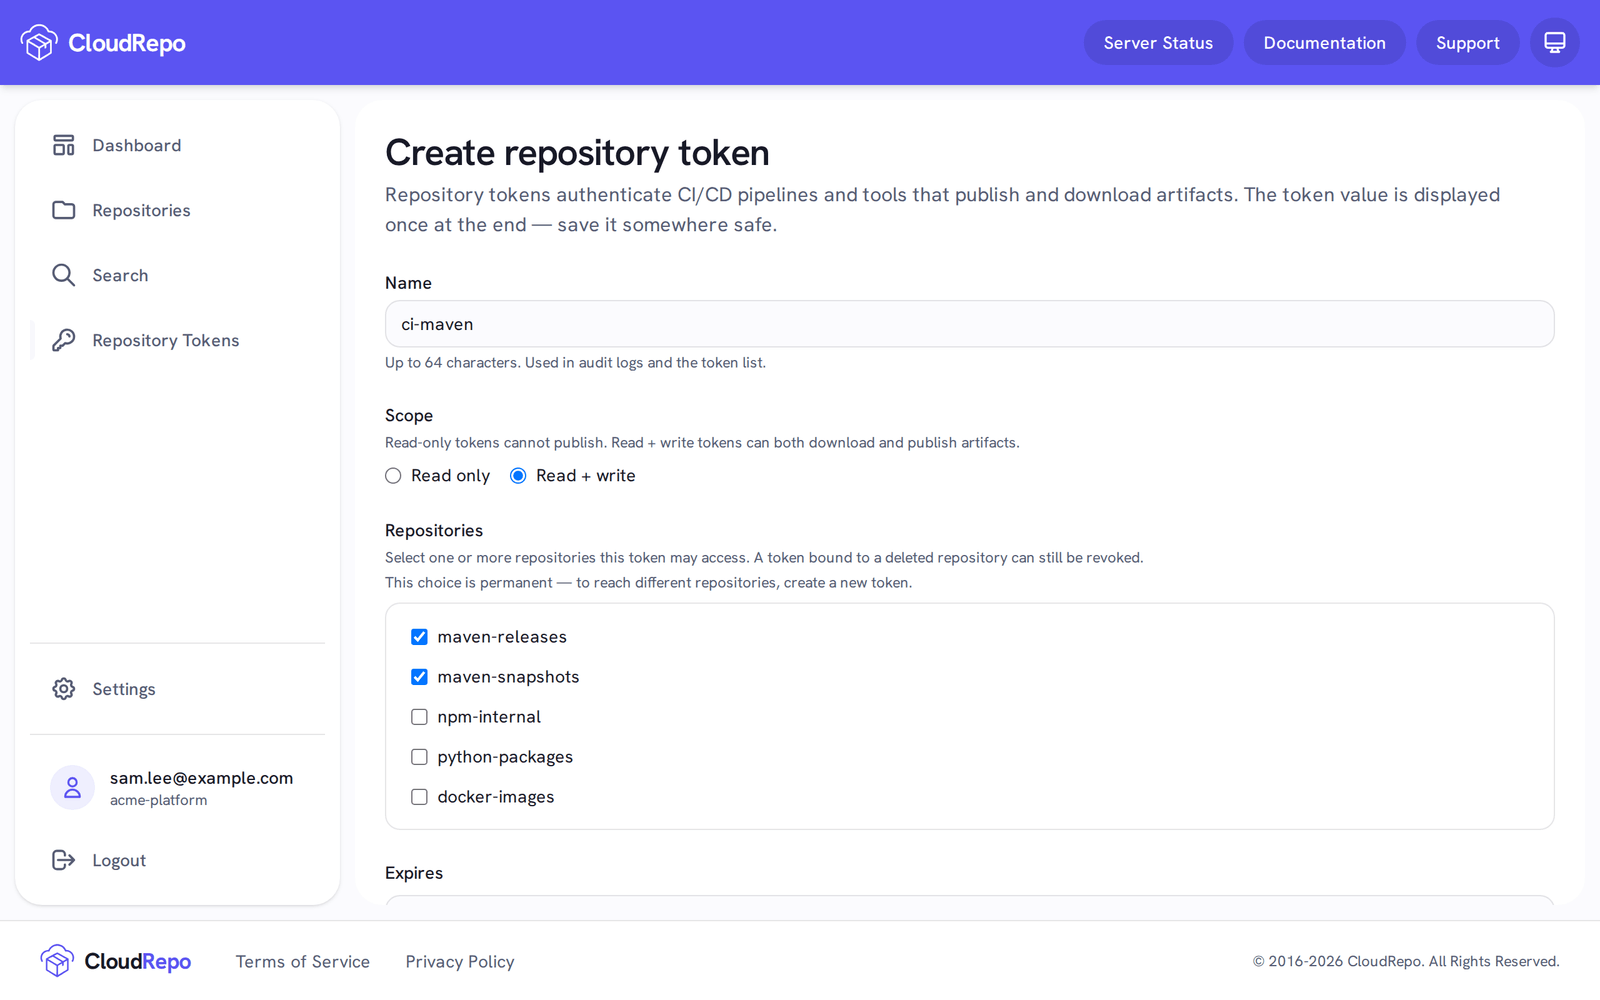
Expected: the Create repository token form, with Name, Scope, Repositories and Expires. If it shows No repositories available instead, your organization has no repositories yet: create one first (see Creating a Repository).
-
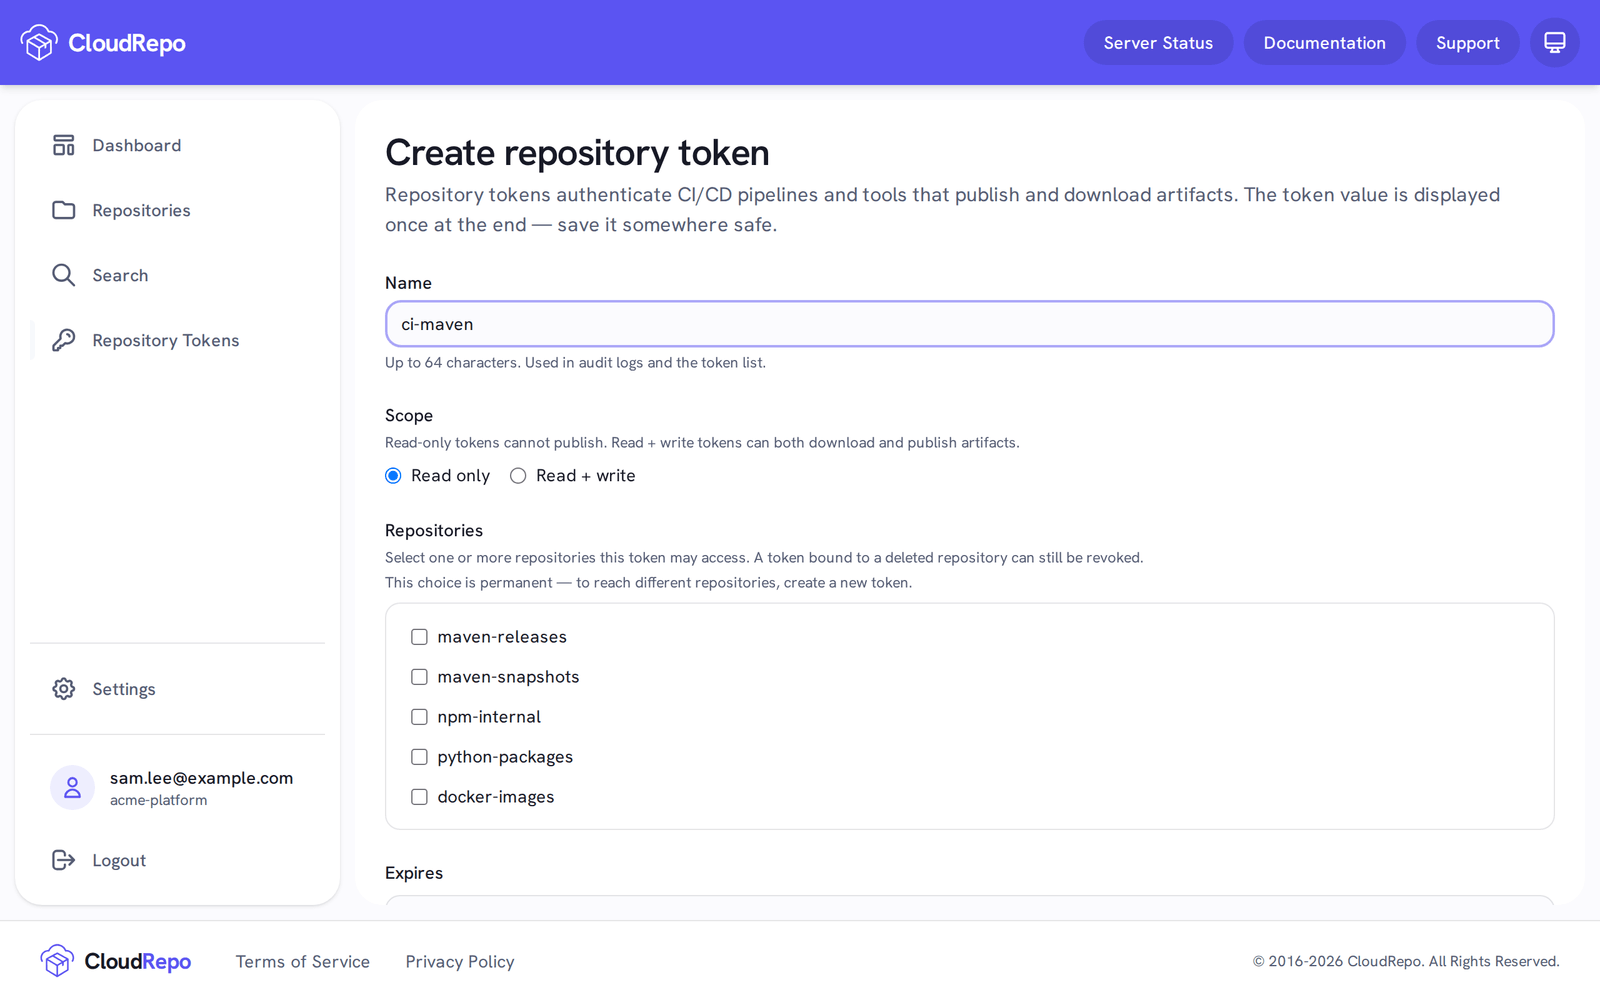
In Name, type a name that says where the token will be used, such as
ci-mavenorlaptop-npm.Expected: the field holds the name. The name is a label for the token list; it is never the username.
-
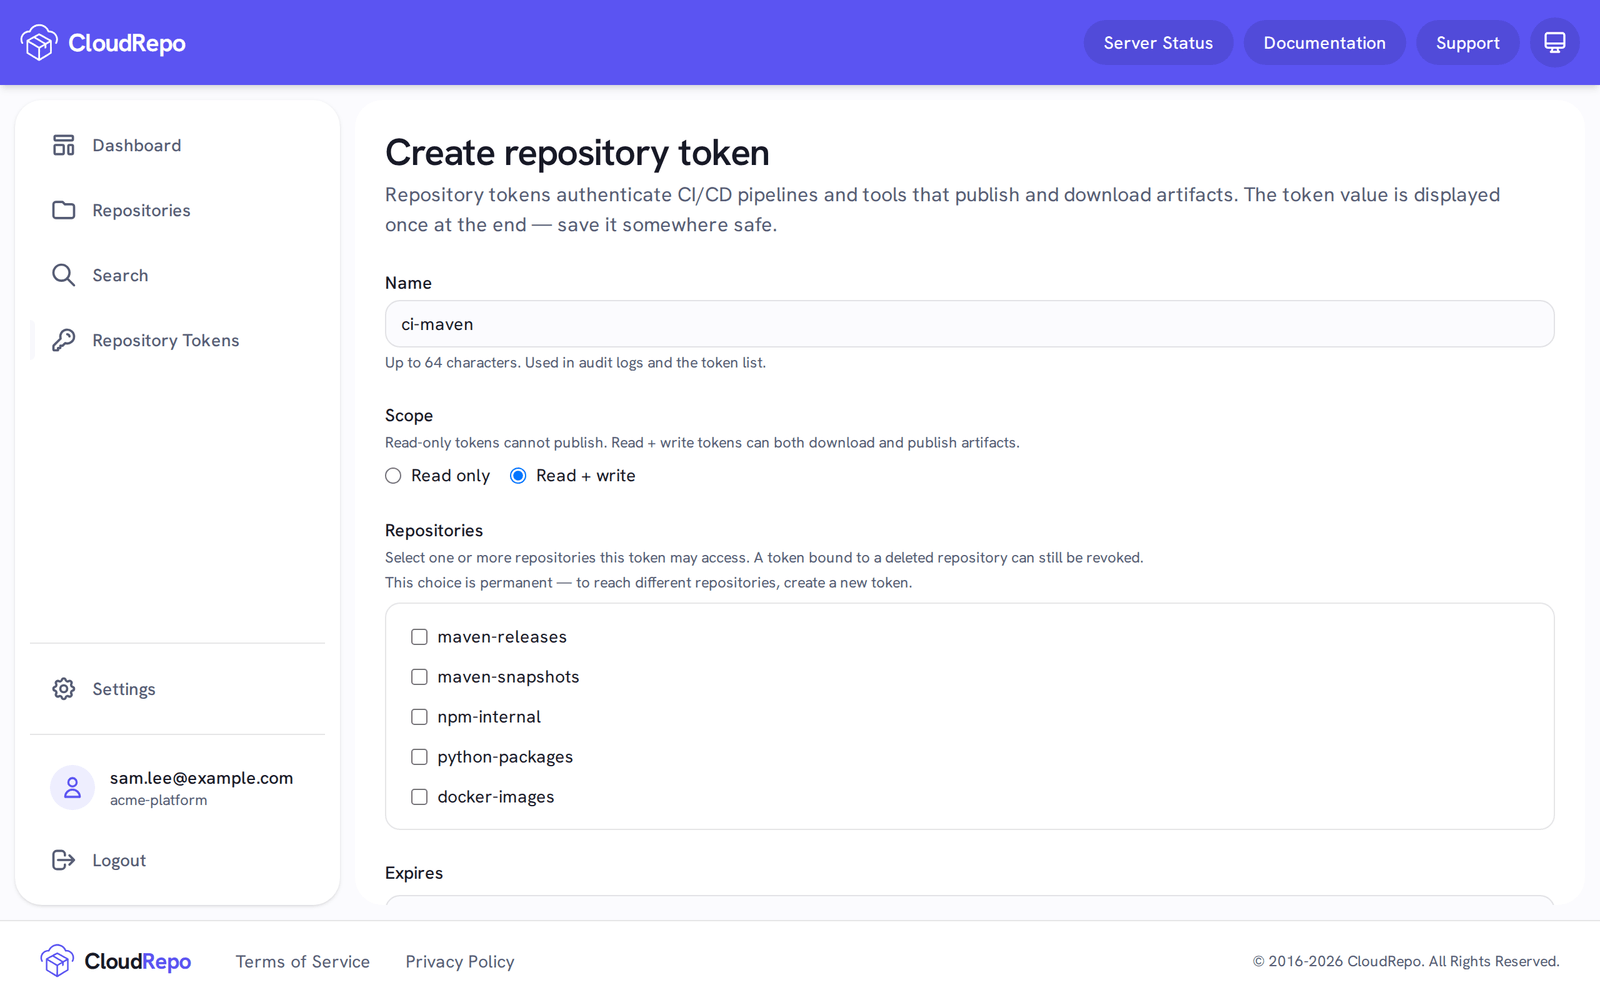
Under Scope, choose Read only to download, or Read + write to download, publish and delete.
Expected: one option is selected.
-
Under Repositories, tick each repository the token may reach.
Expected: the repositories you need are ticked. This choice is permanent: to reach different repositories later, create a new token.
-
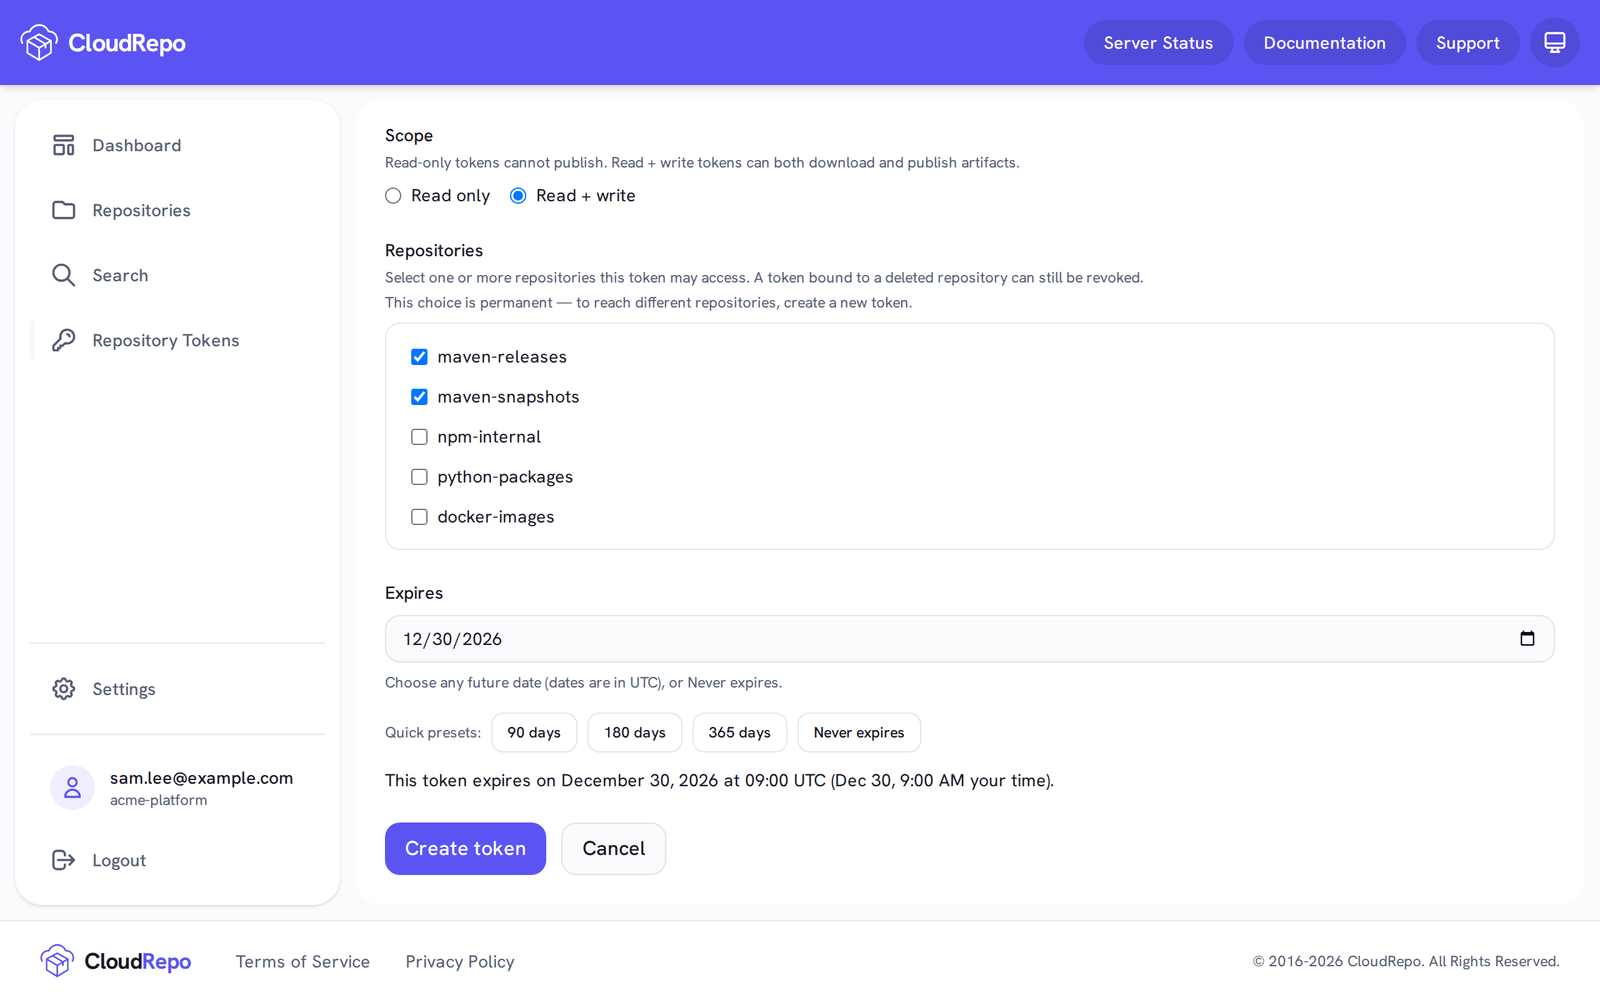
Under Expires, keep the default of 90 days, click 90 days, 180 days or 365 days, pick any date up to 31 December 9999, or click Never expires. A preset counts from when you click it, and the default from when the page opens. A date you pick ends at its start (00:00 UTC), so pick a date after the last day you need the token. For a token a CI system holds, choose a date and rotate the token before it (see Security Hardening).
Expected: the line under the choices says when the token expires, or reads This token will never expire. The expiry is fixed when you create the token, and rotating the token keeps it; for a different expiry, create a new token. When a token expires, builds that use it stop authenticating.
-
Click Create token.
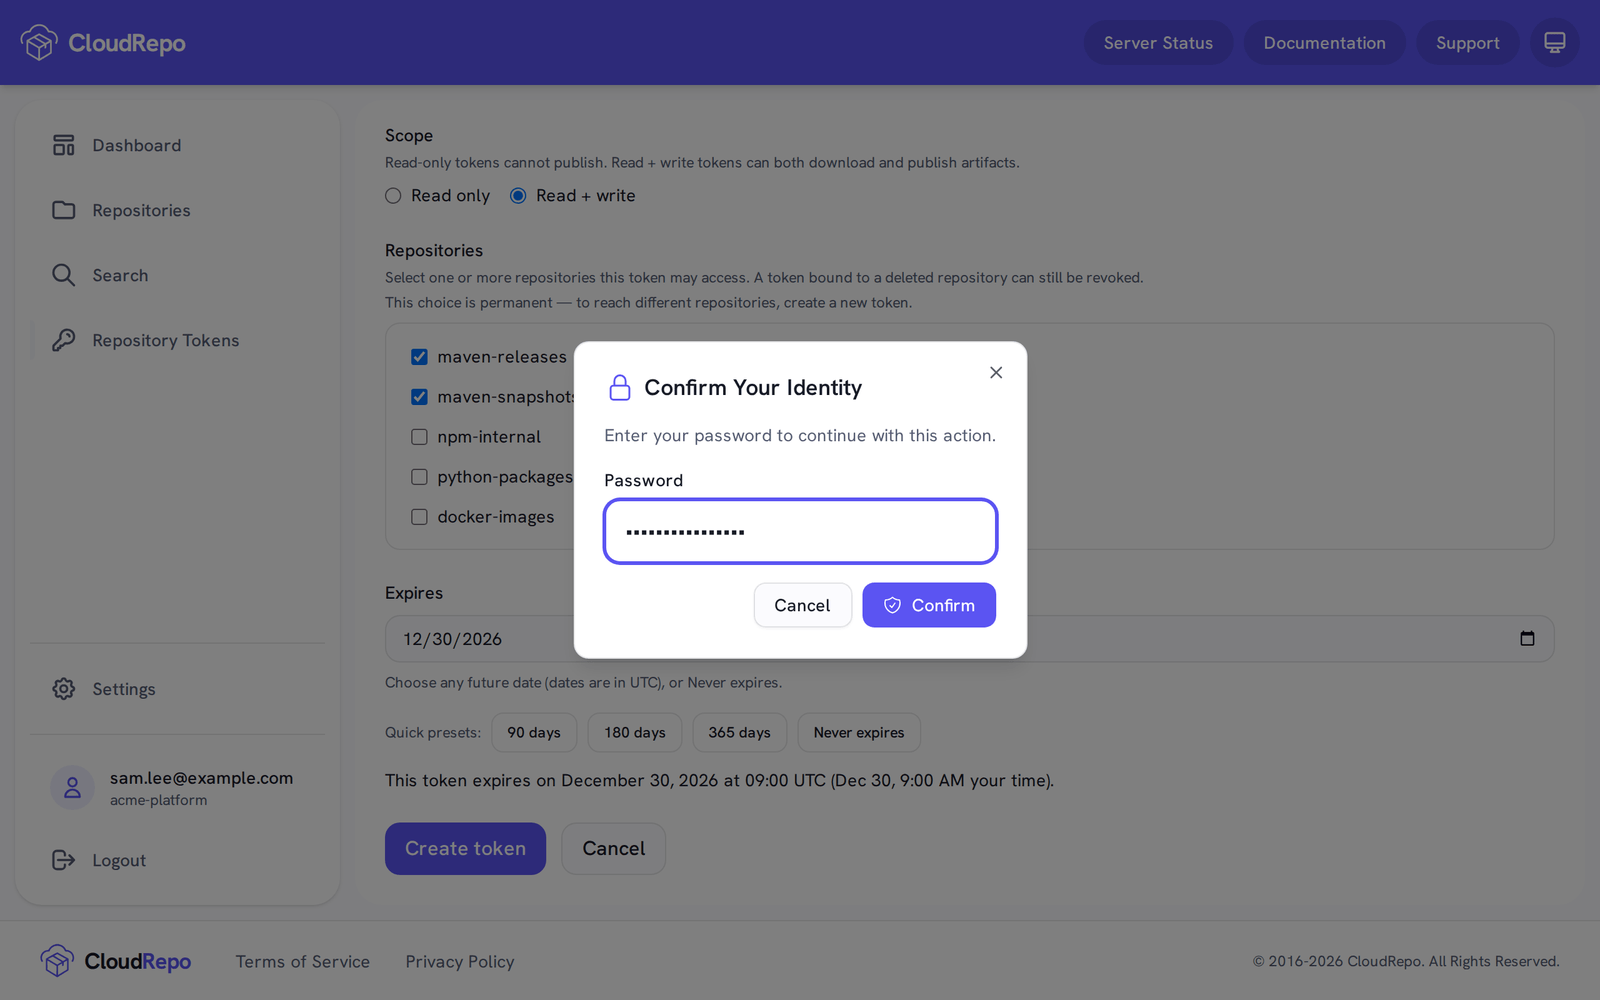
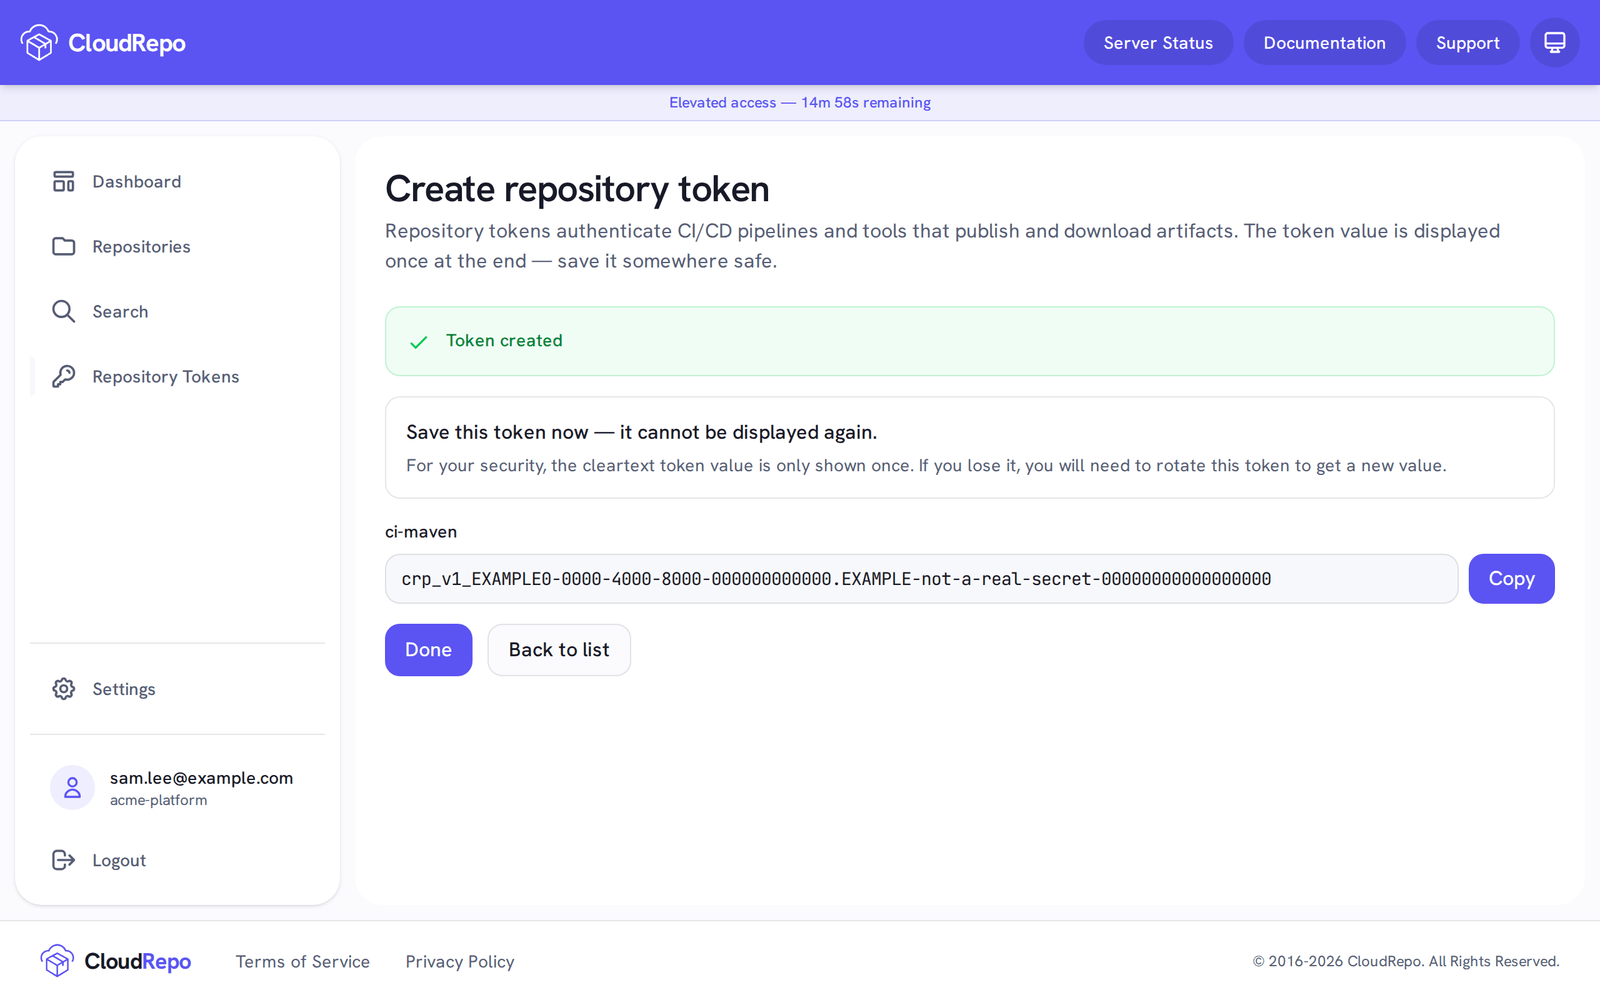
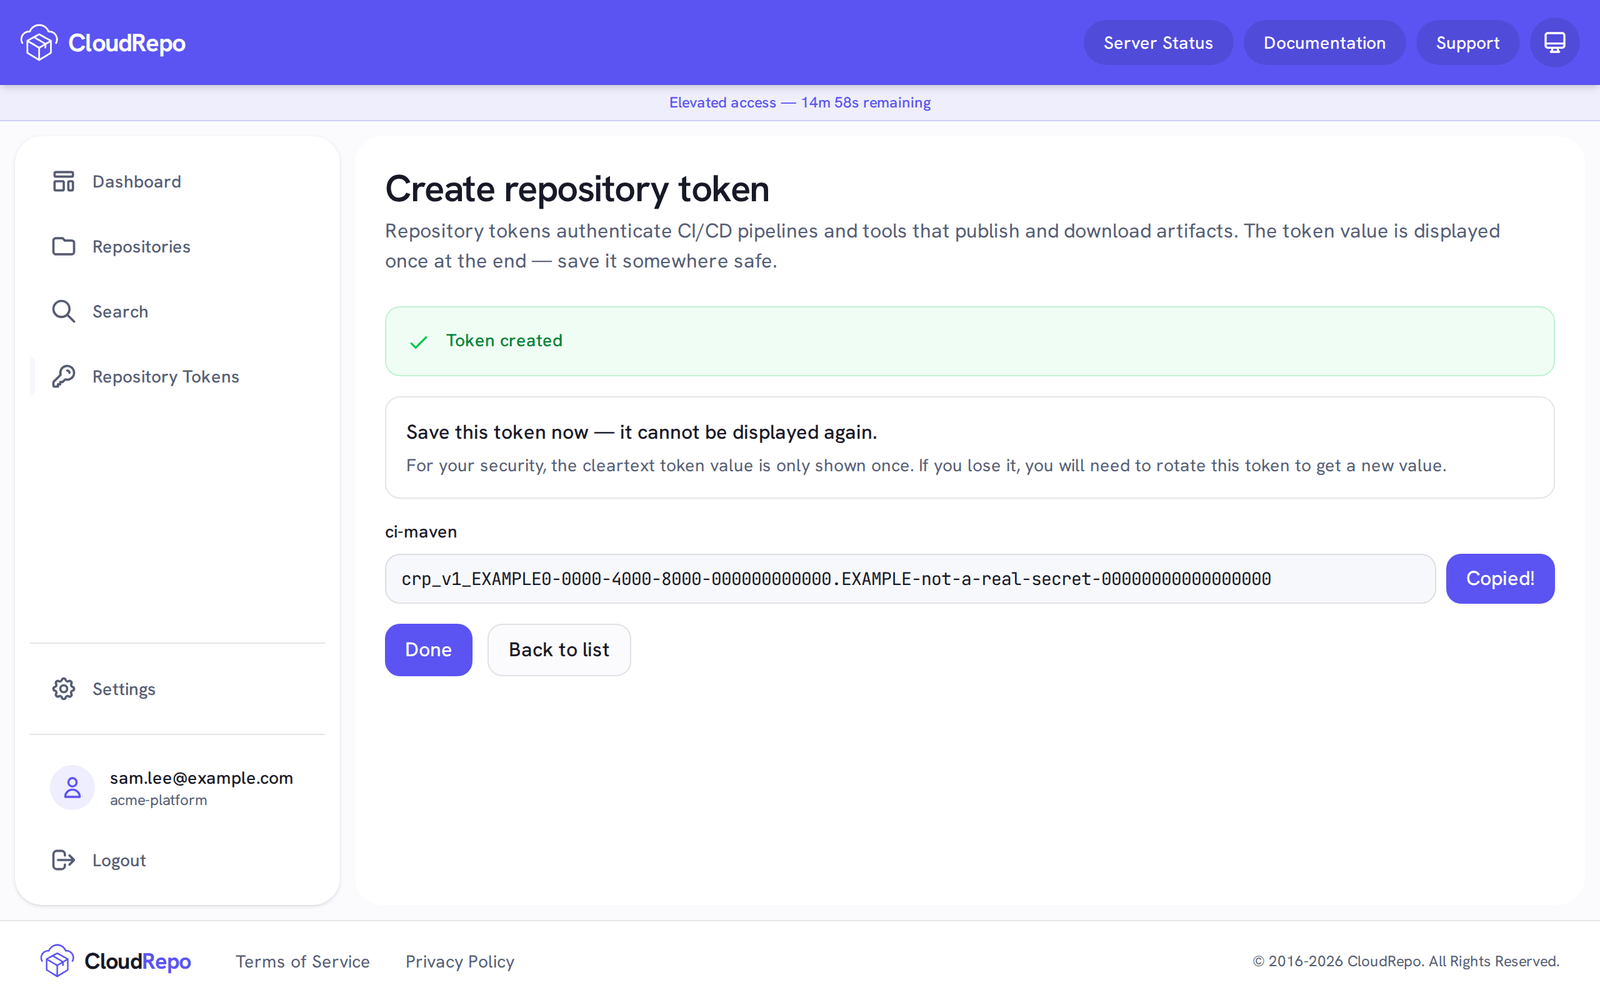
Expected: a green Token created banner and the token value. If you have not confirmed your identity in the last 15 minutes, a Confirm Your Identity dialog comes first: enter your password and click Confirm. If the form says Your account is read-only and cannot create a write-enabled token., your user has read only access: choose Read only, or ask your organization owner for write access.
-
Click Copy next to the token, and store it where your build tool will read it, such as a CI secret.
Expected: the button reads Copied!. CloudRepo shows the token only this once. If you lose it, rotate the token from the Repository Tokens page to get a new value.
Use the Token in Your Client
Section titled “Use the Token in Your Client”Pick your client. The choice is remembered on every page of these docs.
Put the credential in ~/.m2/settings.xml. The <id> is any name you choose; it must match
the <id> of the repository in your pom.xml.
<settings> <servers> <server> <id>cloudrepo</id> <username>you@example.com</username> <password>${env.CLOUDREPO_TOKEN}</password> </server> </servers></settings>${env.CLOUDREPO_TOKEN} reads the token from an environment variable, which keeps it out of the
file. You can paste the token there instead.
<repositories>  <repository>    <id>cloudrepo</id>    <url>https://your-org.mycloudrepo.io/repositories/your-repo</url>  </repository></repositories>
<distributionManagement>  <repository>    <id>cloudrepo</id>    <url>https://your-org.mycloudrepo.io/repositories/your-repo</url>  </repository></distributionManagement>
Deploy once to check that Maven sends the credential:
mvn --batch-mode deployMore: Maven Repositories.
Keep the credential in ~/.gradle/gradle.properties, outside your project:
cloudrepoUsername=you@example.comcloudrepoToken=YOUR_REPOSITORY_TOKENThen read it in the build script.
repositories { maven { url = uri("https://your-org.mycloudrepo.io/repositories/your-repo") credentials { username = providers.gradleProperty("cloudrepoUsername").get() password = providers.gradleProperty("cloudrepoToken").get() } }}repositories { maven { url = "https://your-org.mycloudrepo.io/repositories/your-repo" credentials { username = findProperty("cloudrepoUsername") password = findProperty("cloudrepoToken") } }}To publish, add a publishing block that sends your Java library to the same repository, and run gradle publish:
publishing { publications { create<MavenPublication>("library") { from(components["java"]) } } repositories { maven { url = uri("https://your-org.mycloudrepo.io/repositories/your-repo") credentials { username = providers.gradleProperty("cloudrepoUsername").get() password = providers.gradleProperty("cloudrepoToken").get() } } }}gradle publishA Groovy build script takes the same maven { ... } block under publishing { repositories { ... } }.
More: Gradle Repositories.
npm sends the token on its own, with no username. Put it in the project’s .npmrc, or in
~/.npmrc:
registry=https://your-org.mycloudrepo.io/repositories/your-repo///your-org.mycloudrepo.io/repositories/your-repo/:_authToken=${CLOUDREPO_TOKEN}npm replaces ${CLOUDREPO_TOKEN} with the environment variable of that name, so the file can be
committed without the token in it. Keep the trailing / on both lines, and keep the
//your-org... line identical to the registry URL without https:.
Publish a package to check that npm sends the token:
npm publishnpm loginalso works, for a local npm repository: it opens the admin portal in your browser and writes a token to.npmrcfor you. That token starts withcrn_v1_and works only on the local npm repository you rannpm loginagainst. A proxy npm repository refuses it with403(npm_token_not_supported_on_proxy), even thoughnpm loginagainst the proxy succeeds; use a token from Repository Tokens there.- An
npm logintoken is read-only unless you choose Read-write when you authorize it and your user has write access, sonpm publishanswers403with a read-only one. A token created under Repository Tokens works on every npm repository it reaches, local or proxy. npm token createis not supported: create tokens in the admin portal.
More: npm Repositories.
To upload with twine, use the repository URL without /simple/. twine’s username is a plain
field, so the @ in your email address needs no encoding:
[distutils]index-servers = cloudrepo
[cloudrepo]repository = https://your-org.mycloudrepo.io/repositories/your-repousername = you@example.compassword = YOUR_REPOSITORY_TOKEN
Build your package, then upload what you built:
pip wheel . --no-deps -w disttwine upload --repository cloudrepo dist/*In CI, skip the file and set the environment instead:
export TWINE_USERNAME="you@example.com"export TWINE_PASSWORD="$CLOUDREPO_TOKEN"twine upload --repository-url https://your-org.mycloudrepo.io/repositories/your-repo dist/*pip takes the credential inside the index URL. Write the @ in your email address as %40.
On Windows the file is pip.ini:
[global]index-url = https://you%40example.com:YOUR_REPOSITORY_TOKEN@your-org.mycloudrepo.io/repositories/your-repo/simple/The same URL works for one command or one shell session, through the PIP_INDEX_URL environment
variable. In CI,
set PIP_INDEX_URL from a secret instead of writing a file:
export PIP_INDEX_URL="https://you%40example.com:${CLOUDREPO_TOKEN}@your-org.mycloudrepo.io/repositories/your-repo/simple/"pip install my-packageMore, including keeping the token in your system keyring: Basic Configuration Examples.
The username is your email address, not __token__. More:
Python Repositories, and for Poetry and
uv the pages under Python.
Log in to the host alone, with your email address and the token:
echo "$CLOUDREPO_TOKEN" | docker login your-org.mycloudrepo.io \ --username you@example.com \ --password-stdinExpected: Login Succeeded. Then build and push an image, with the repository in the image reference:
docker build -t your-org.mycloudrepo.io/repositories/your-repo/my-app:1.0.0 .docker push your-org.mycloudrepo.io/repositories/your-repo/my-app:1.0.0The password is the token, not the password you sign in to the admin portal with. Use a token: it reaches only the repositories you tick, can be read only, can carry an expiry, and can be revoked without changing anyone’s password. More: Docker Repositories.
When a Client Answers 401, 403 or 404
Section titled “When a Client Answers 401, 403 or 404”A refused credential answers 401 Unauthorized; a credential that may not do what was asked
answers 403 Forbidden. A proxy repository answers 404 Not Found instead of 403, with
one exception: it refuses an npm login token with 403 (see the npm item below).
npm is different for a bad token. npm sends _authToken as a Bearer token, and a token that is
mistyped, expired, revoked or from another organization answers 404 Not Found, not 401. npm
then prints 404 Not Found for the package. If npm reports 404 for a package you know
exists, check the token first.
Check these in order:
- The username. It must be the email address of the account that created the token (capital
letters do not matter). Not
__token__, not the token’s name, not your organization name. - The token. Paste it whole, starting at
crp_v1_. Check on the Repository Tokens page that it has not expired or been revoked. With npm, a bad token shows as404. - The repository. The token reaches only the repositories ticked when it was created. A different repository needs a token that includes it.
- Publishing. A Read only token downloads but cannot publish; create a Read + write token for the build that publishes.
- An npm token elsewhere. A token from
npm login(crn_v1_) works only on the local npm repository it was created for, and publishes only if you chose Read-write and your user has write access. A proxy npm repository refuses it with403. Use a token from Repository Tokens for a proxy npm repository, every other npm repository, Maven, Python and Docker. - The expiry. The Expires column on the Repository Tokens page shows when each token stops working, or Never expires.
Service Keys for Your Pipelines
Section titled “Service Keys for Your Pipelines”A service key belongs to your organization, not to a person. It keeps working when the person who created it leaves, which makes it the credential for CI. Only the organization owner can create one. There is no screen for service keys: the owner creates and revokes them through the CloudRepo API, with the script below.
A service key expires at most 90 days after it is created, so note the date and create the next key before it.
Save the script as service-key.sh and set the five values at the top. Then run
bash service-key.sh create to create a key, or bash service-key.sh revoke <key-id> to revoke
one before its date. It asks for the owner’s password, and it needs Python 3 and curl 7.55 or
later.
#!/usr/bin/env bash# Create or revoke an organization service key with the CloudRepo API.# Run it with create, or with revoke and the key ID that create printed.set -euo pipefail
API=https://api.cloudrepo.ioORG=your-org                   # your organization IDOWNER=you@example.com          # the organization owner's email addressNAME=ci-build                  # create: where the key will be usedSCOPE=read,write               # create: read to download only; read,write to publish as wellcase "$API" in https://*) ;; *) echo "API must start with https://. Nothing was sent." >&2; exit 2;; esac
MODE=${1:-}; KEY_ID=${2:-}case "$MODE" in  create) ;;  revoke) # A key ID is a lowercase UUID. Refuse anything else before any request is sent.    [[ $KEY_ID =~ ^[0-9a-f]{8}-[0-9a-f]{4}-[0-9a-f]{4}-[0-9a-f]{4}-[0-9a-f]{12}$ ]] \      || { echo "Usage: bash $0 revoke <key-id>, where <key-id> is the key ID create printed"; exit 1; } ;;  *) echo "Usage: bash $0 create | revoke <key-id>"; exit 1 ;;esac
umask 077WORK=$(mktemp -d)trap 'rm -rf "$WORK"' EXIT# field NAME: one field of the last answer, or nothing when the answer is not JSON.field() { python3 -I -c 'import json,systry: print(json.load(open(sys.argv[1])).get(sys.argv[2], ""))except Exception: print("")' "$WORK/out" "$1"; }
# 1. Sign in as the owner.IFS= read -rsp 'Owner password: ' PW; echoS=$(printf '%s' "$PW" | ORG="$ORG" OWNER="$OWNER" python3 -I -c 'import json,os,sys; print(json.dumps({"organizationId": os.environ["ORG"], "emailAddress": os.environ["OWNER"], "passphrase": sys.stdin.read()}))' \  | curl -sS --proto =https -X POST "$API/api/authorize" -H 'Content-Type: application/json' --data-binary @- \      -o "$WORK/out" -w '%{http_code}')[ "$S" = 200 ] || { echo "Sign-in refused (HTTP $S). $(field error)"; exit 1; }STEP_UP=passwordcase "$(field mfa_action)" in  "") ;;  challenge) # This sign-in also asks for a code from the owner's authenticator app.    unset PW; STEP_UP=totp    CHALLENGE=$(field challenge_token)    read -rp 'Code from your authenticator app: ' CODE    S=$(printf '{"challenge_token": "%s", "code": "%s"}' "$CHALLENGE" "$CODE" \      | curl -sS --proto =https -X POST "$API/api/mfa/verify" -H 'Content-Type: application/json' --data-binary @- \          -o "$WORK/out" -w '%{http_code}')    [ "$S" = 200 ] || { echo "The code was refused (HTTP $S). $(field error)"; exit 1; } ;;  *) echo "Sign in to the admin portal once and finish what it asks for, then run this again."; exit 1 ;;esac[ -n "$(field token)" ] || { echo "The sign-in did not finish (HTTP $S). $(field error)"; exit 1; }printf 'Authorization: Bearer %s\n' "$(field token)" > "$WORK/auth"# post PATH: send the JSON on standard input to the API as the owner; print the HTTP status.post() { curl -sS --proto =https -X POST "$API$1" -H @"$WORK/auth" -H 'Content-Type: application/json' \           --data-binary @- -o "$WORK/out" -w '%{http_code}'; }
if [ "$MODE" = revoke ]; then  unset PW  S=$(curl -sS --proto =https -X DELETE "$API/api/repository-tokens/$KEY_ID" -H @"$WORK/auth" \        -o "$WORK/out" -w '%{http_code}')  [ "$S" = 204 ] || { echo "The key was not revoked (HTTP $S). $(field error)"; exit 1; }  echo "Key $KEY_ID is revoked."  exit 0fi
# 2. Confirm your identity: with the password, or, when the sign-in asked for a code, with the#    NEXT code from the app (the one you signed in with is refused a second time).if [ "$STEP_UP" = totp ]; then  read -rp 'Next code from your authenticator app (wait for a new one): ' CODE  S=$(printf '{"method": "totp", "credential": "%s", "action": "repository-token-mint"}' "$CODE" \    | post /api/auth/confirm-identity)else  S=$(printf '%s' "$PW" | python3 -I -c 'import json,sys; print(json.dumps({"method": "password", "credential": sys.stdin.read(), "action": "repository-token-mint"}))' \    | post /api/auth/confirm-identity)  unset PWfiCONFIRMATION=$(field confirmation-token)[ "$S" = 200 ] && [ -n "$CONFIRMATION" ] || { echo "Your identity was not confirmed (HTTP $S). $(field error)"; exit 1; }
# 3. Choose the repositories the key may reach.S=$(curl -sS --proto =https "$API/api/repositories" -H @"$WORK/auth" -o "$WORK/out" -w '%{http_code}')[ "$S" = 200 ] || { echo "Could not list repositories (HTTP $S). $(field error)"; exit 1; }python3 -I -c 'import json,sys; [print(r["repositoryEntityId"], r["repositoryId"]) for r in json.load(open(sys.argv[1]))]' "$WORK/out"read -rp 'IDs from the first column, separated by spaces: ' IDS
# 4. Create the key. A service key expires at most 90 days out; this one expires in 89.EXPIRES=$(( ( $(date +%s) + 89 * 86400 ) * 1000 ))S=$(printf '%s' "$CONFIRMATION" | NAME="$NAME" SCOPE="$SCOPE" IDS="$IDS" EXPIRES="$EXPIRES" python3 -I -c 'import json,os,sys; print(json.dumps({"name": os.environ["NAME"], "format": "generic", "repo-ids": os.environ["IDS"].split(), "scope": os.environ["SCOPE"].split(","), "expires-at": int(os.environ["EXPIRES"]), "backing": {"kind": "org"}, "confirmation-token": sys.stdin.read()}))' \  | post /api/repository-tokens)[ "$S" = 201 ] && [ -n "$(field token-value)" ] || { echo "The key was not created (HTTP $S). $(field error)"; exit 1; }echo "Key ID, to revoke it: $(field token-id)"echo "Key, shown once: $(field token-value)"
The script prints a key that starts with crk_. Store it as a secret in your CI, and use it
wherever this page puts a repository token. A service key is not checked against a username, so
the email address rule above does not apply to it: where a build tool also asks for a username,
use token.
Keep the key ID the script prints. It is how you revoke the key with
bash service-key.sh revoke <key-id>.