First Steps
This is the shortest path from nothing to a package in CloudRepo. Each step has its own page; this page is the map.
The path
Section titled “The path”- Sign Up and Sign In. Create your organization, open the verification link in your email, and sign in to the admin portal.
- Create Your First Repository. Choose Maven, Python, npm or Docker.
- Create a repository token. It is the credential your build tool sends. Copy it when the portal shows it: it is shown once.
- Connect your tool and publish. Pick your format: Maven or Gradle, Python (pip and twine), npm or Docker. Each has a ready-to-paste setup and a command that checks it.
- Install what you published, from a second project or from CI, with the same token.
Teammates and CI systems can have their own credentials: see Create Your First User and the CI guides under Continuous Integration and Deployment.
The guided setup in the portal
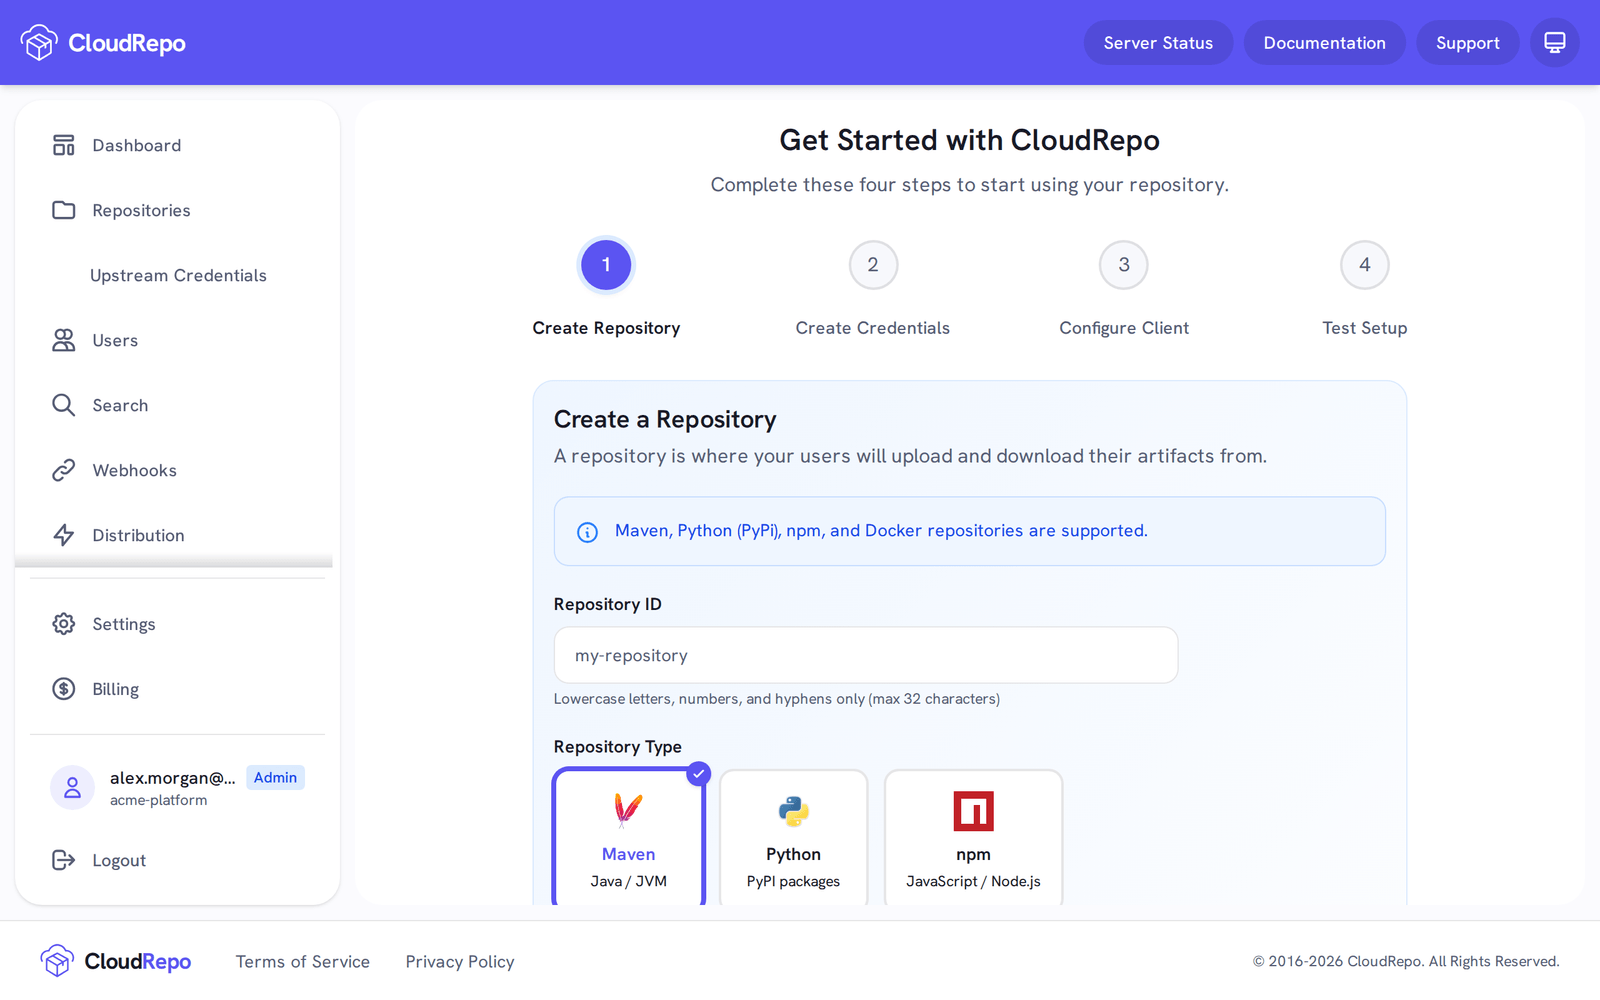
Section titled “The guided setup in the portal”The first time you sign in as the owner, the portal opens Get Started with CloudRepo, four
steps, numbered 1 to 4 above the form: Create Repository, Create Credentials,
Configure Client and Test Setup. It covers the same ground as steps 2 to 4 above. You can follow it or
click Skip and go to Dashboard at any time, and, as the owner, you can return to it later at
admin.cloudrepo.io/onboarding.
Its second step creates a repository user: an account with its own email address and password, for a person or a system. Your build tool still sends a repository token, not that password; the third step reminds you to create one under Repository Tokens.
Check that it works
Section titled “Check that it works”The format page’s command is the check: a publish that succeeds proves the credential, the URL and the repository agree. If it fails, look the code up in Error codes, which lists the codes documented so far and the fix for each.